Take your basketball to the next level
Save time, organize your team and prepare professional practices with advanced tools.
F
Play#Half-court basketball plays #Special basketball plays
FAQ: Basketball Plays for Half-Court Offense
FAQ: Basketball Plays for Special and Surprise Tactics


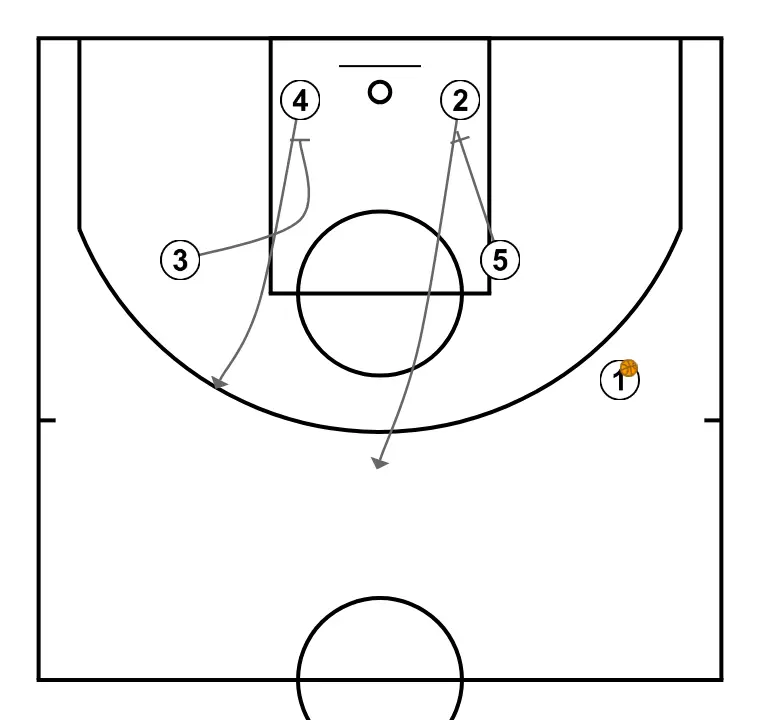
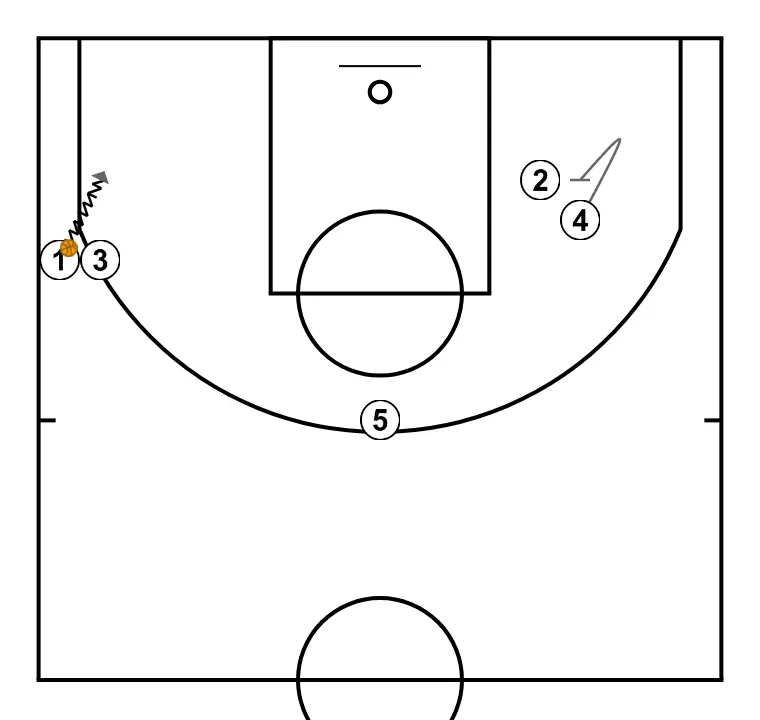
2 shifts to an optimal spot on the court to maximize offensive efficiency. 2 moves to support teammates and maintain constant game flow. Small forward blocks the defender, opening space for cuts, drives, or shots. 4 alters position to create defensive mismatches and penetration options.
Center plants a screen to improve attack angle and facilitate ball reception. Small forward executes an effective screen maintaining the team’s offensive flow. Shooting guard places themselves strategically to generate passing angles and anticipate defensive moves. 4 shifts to an optimal spot on the court to maximize offensive efficiency.
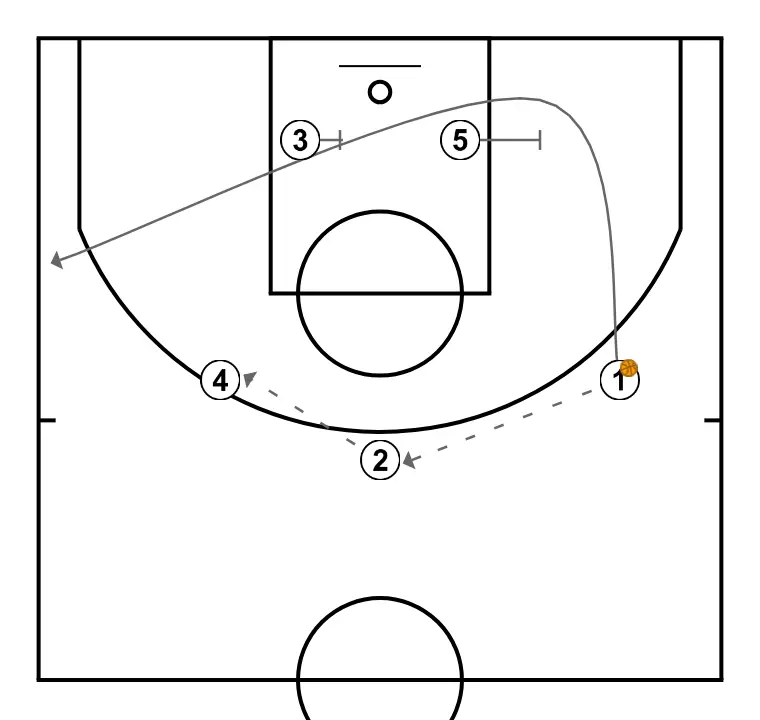
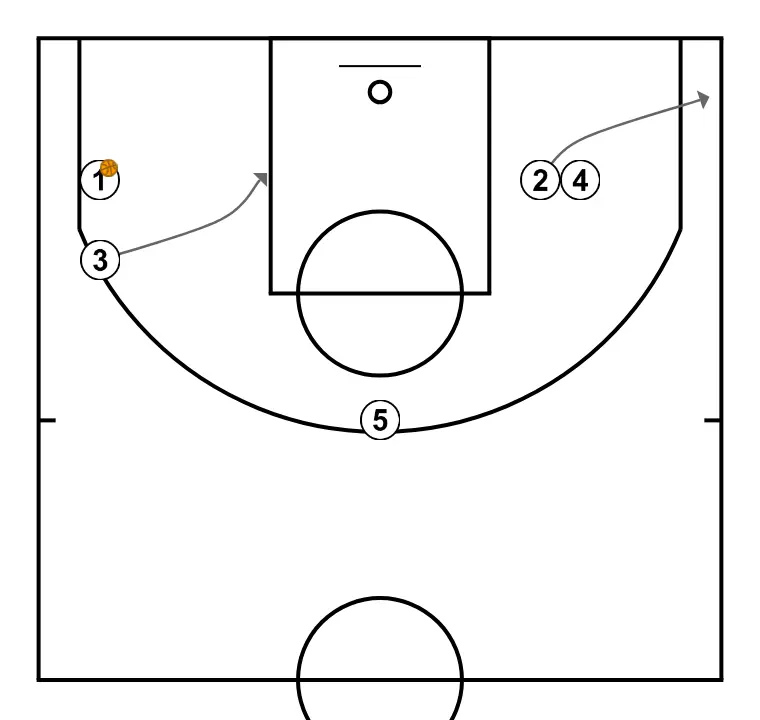
Point guard changes location seeking advantage over the defender and scoring opportunities. 5 establishes a screen to create advantage and confuse the defense. 3 performs a tactical screen causing mismatches in the opponent’s defense.
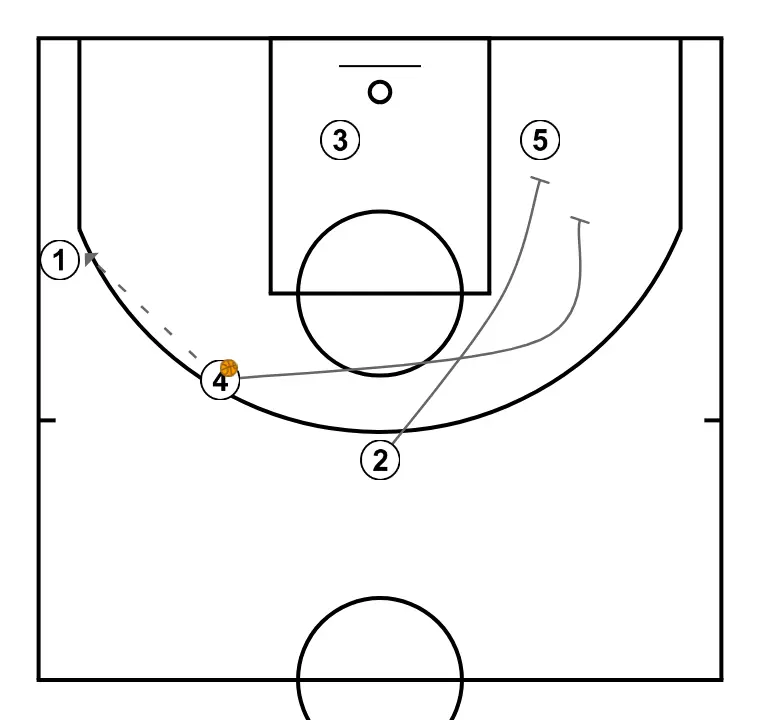
2 blocks the defender, opening space for cuts, drives, or shots. Power forward plants a screen to improve attack angle and facilitate ball reception.

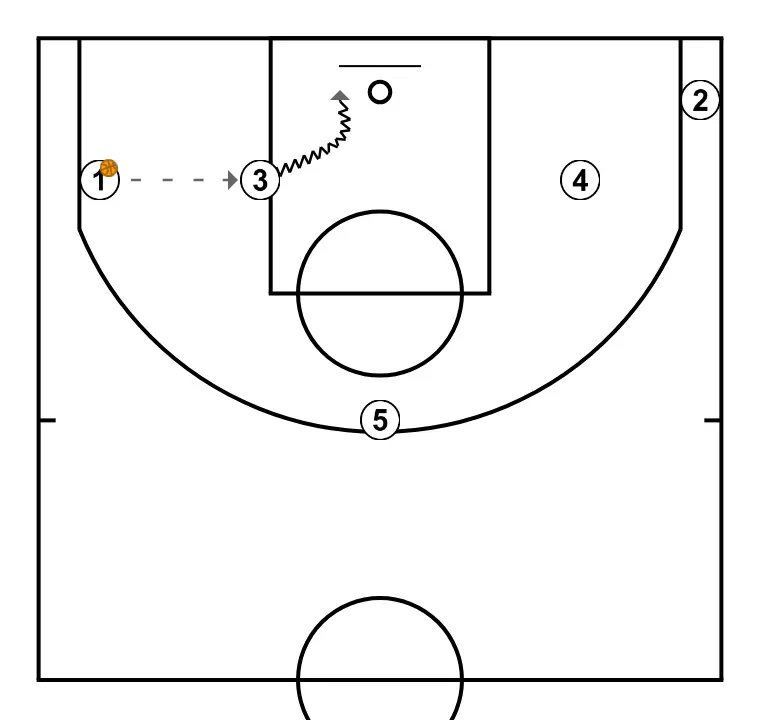
5 alters position to create defensive mismatches and penetration options. 3 plants a screen to improve attack angle and facilitate ball reception.
Power forward sets a strong screen to free a teammate and create close-range scoring opportunities.
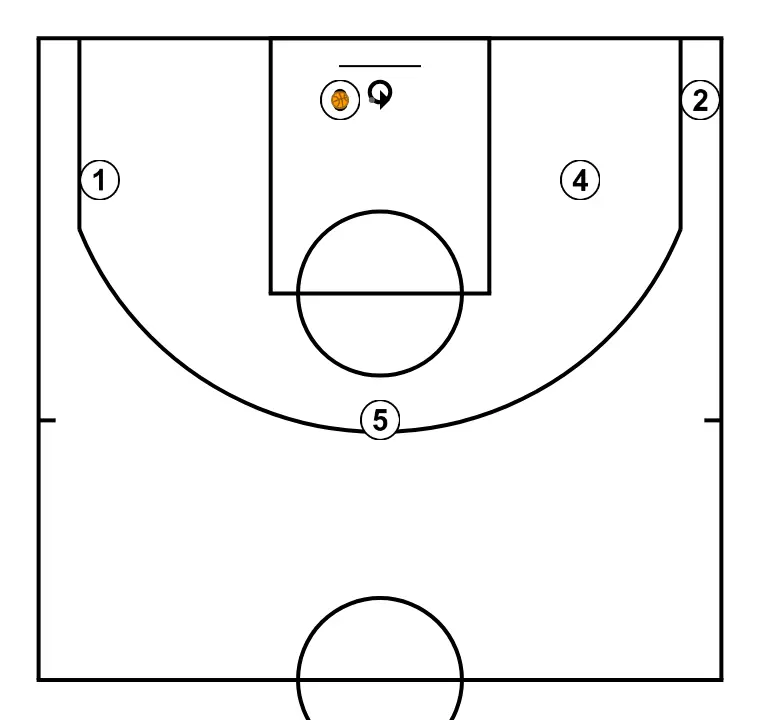
Small forward changes location seeking advantage over the defender and scoring opportunities. Shooting guard moves strategically to provide new passing lanes and open space.


")


