Central Pick & Roll (2)
⭐ PRO Features
Take your basketball to the next level
Save time, organize your team and prepare professional practices with advanced tools.
Unlimited private plays and drills
Complete season planning
Live stats recording
Advanced team and player management
Central Pick & Roll (2)
Play
852 views ·
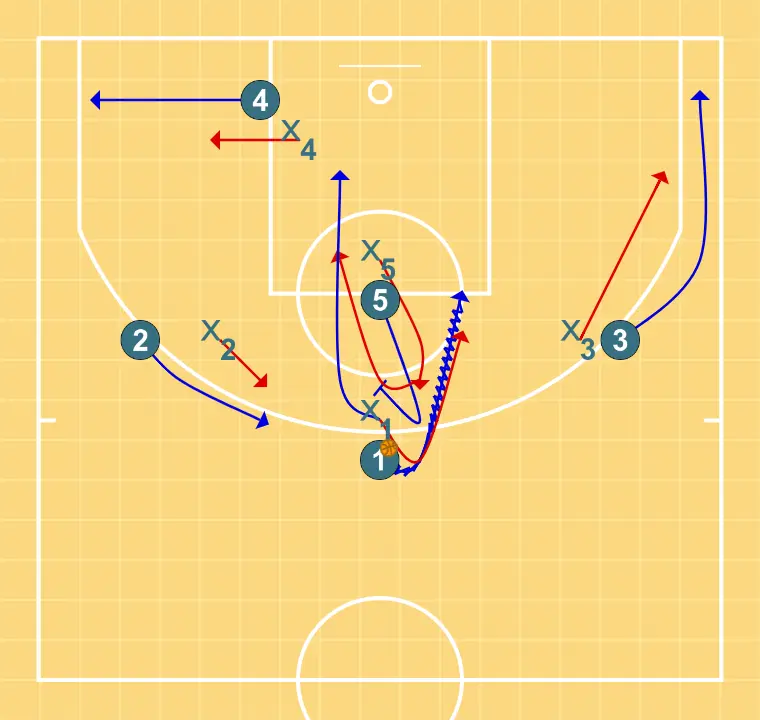
Pick & roll play between 5 and 1, starting with the point guard at the central perimeter, 5 at the free throw line, and 2 and 3 at 45º on opposite sides.
- 5 sets a screen for 1 while 3 and 4 occupy the corners to create space and a potential pass.
- As 1 drives, 2 occupies the central area and 5 rolls to gain position behind the defense.
- 1 shoots from the free-throw elbow or passes to 5 in the low post.
Generated from Central Pick & Roll, created by Juan Knario Deve


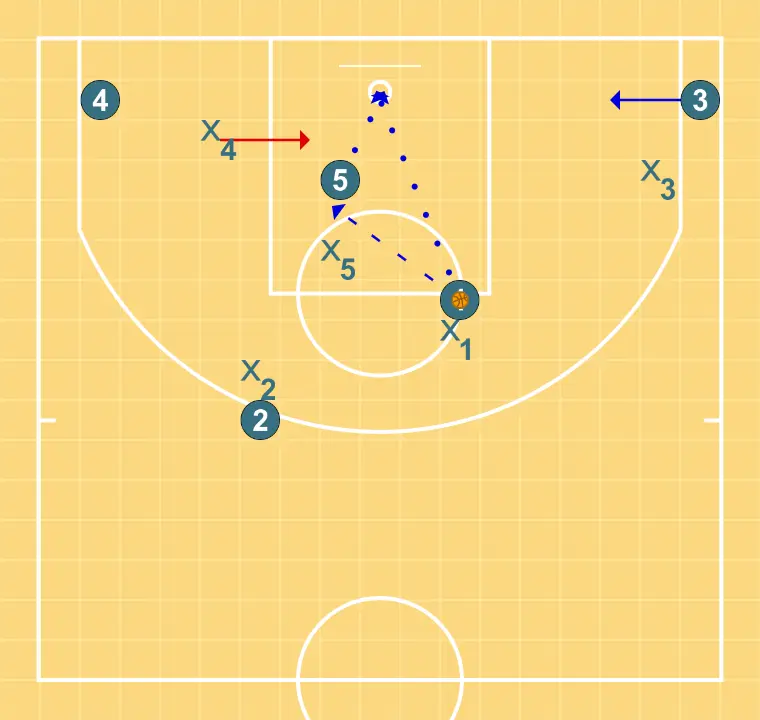
5 comes up to set a screen for 1, while players 3 and 4 occupy the perimeter corners to create space for the point guard and 5’s roll. Once 1 initiates the action, 2 moves up to fill his position.
STEP 1
5 comes up to set a screen for 1, while players 3 and 4 occupy the perimeter corners to create space for the point guard and 5’s roll. Once 1 initiates the action, 2 moves up to fill his position.
1 shoots to the basket from the free-throw elbow or passes to the low post for 5 to finish inside. If help comes, 5 can kick out to the corners for a three-point shot.
STEP 2
1 shoots to the basket from the free-throw elbow or passes to the low post for 5 to finish inside. If help comes, 5 can kick out to the corners for a three-point shot.
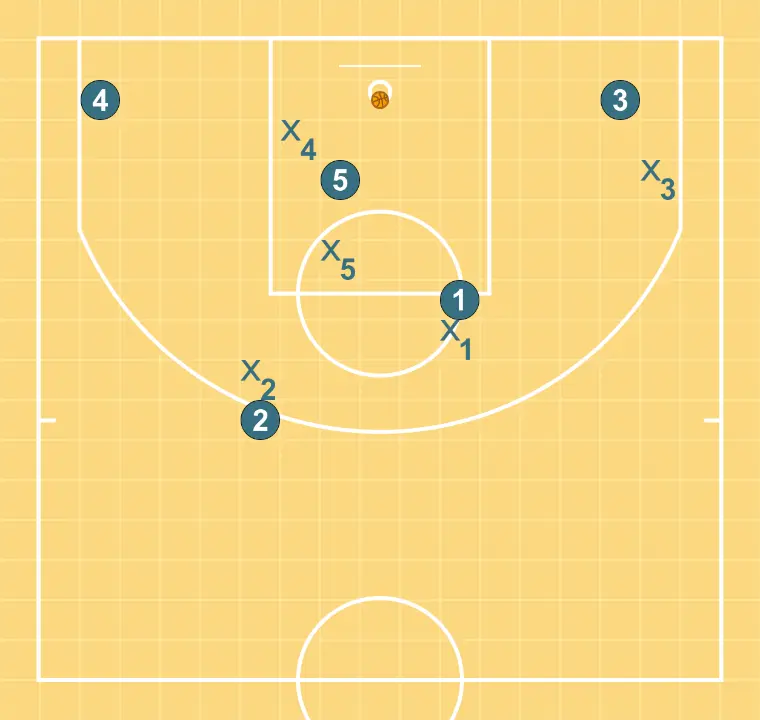
Finishing
STEP 3
Finishing