🚀 Go Pro and level up your game
Access advanced tools, plays, and stats for professional coaches.
✅ First month free! Cancel anytime
Z - ATAQUE CONTRA ZONA
Play#Half-court basketball plays #Zone defense basketball plays #Special basketball plays
FAQ: Basketball Plays for Half-Court Offense
FAQ: Basketball Plays for Zone Defense Strategies
FAQ: Basketball Plays for Special and Surprise Tactics
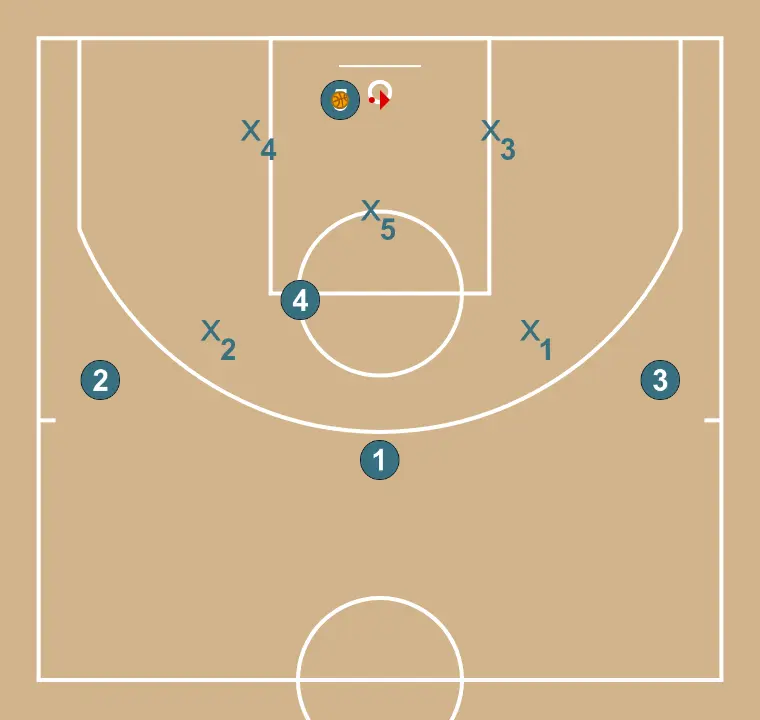
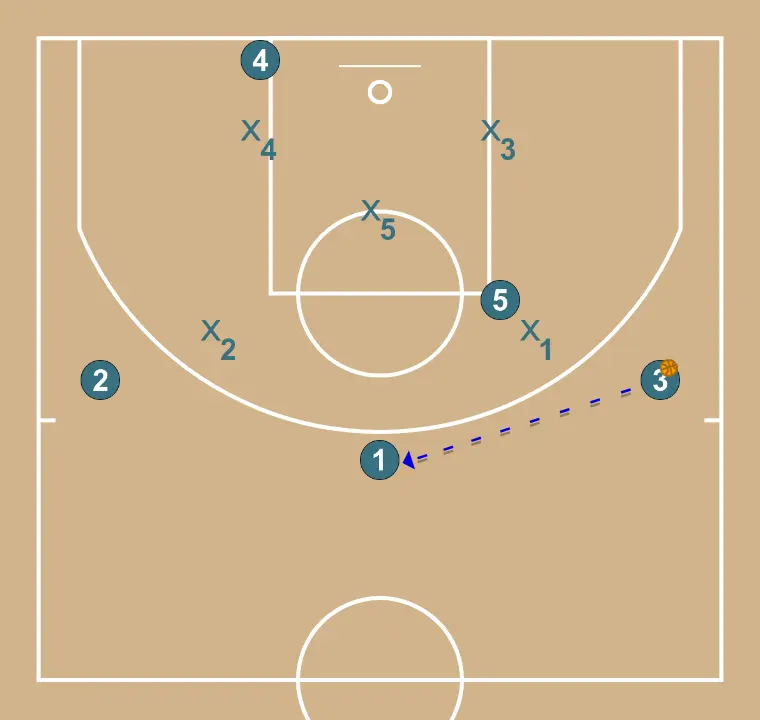
The initial setup is organized to create synergy between movements, screens, and passes for the opening play.

Players are positioned at key points on the court, seeking offensive and defensive balance.
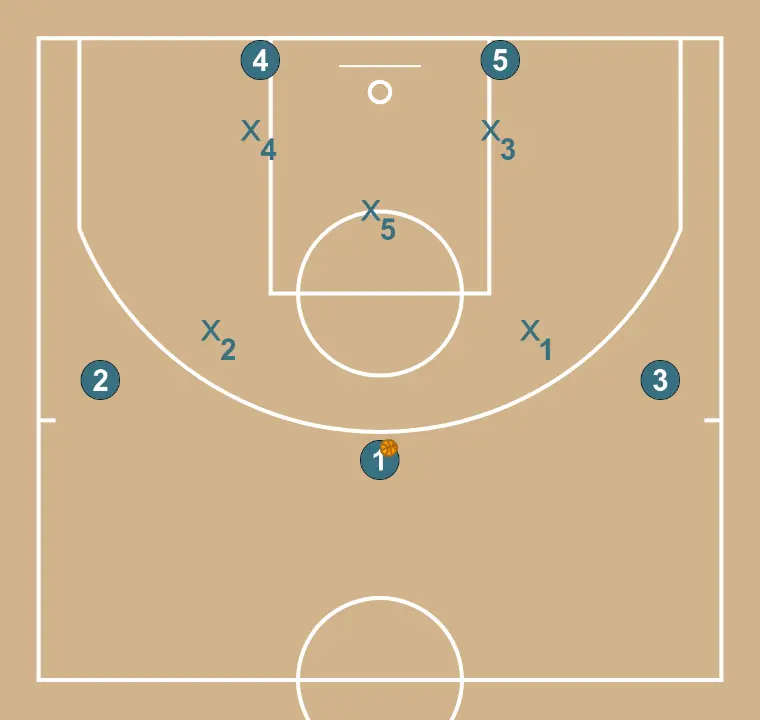
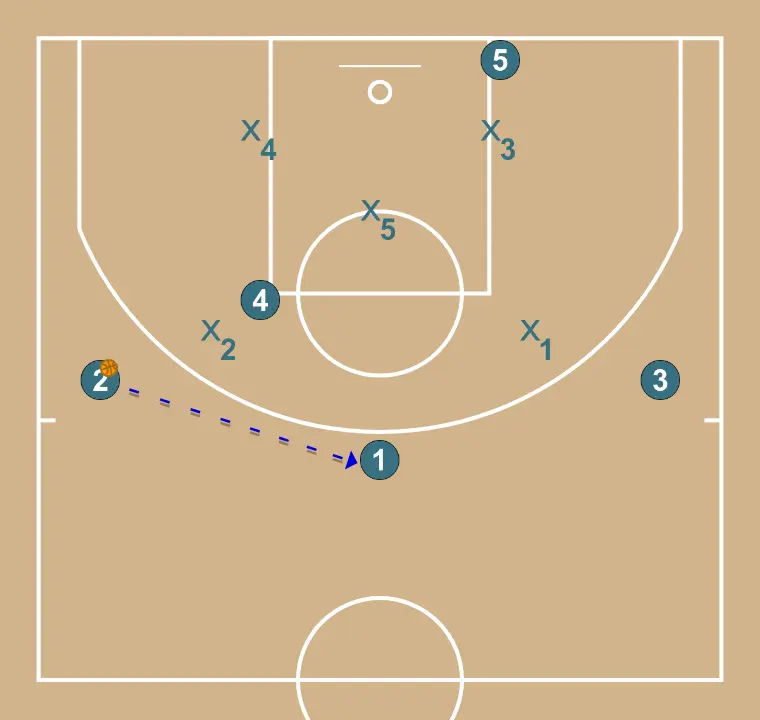
5 moves strategically to provide new passing lanes and open space.
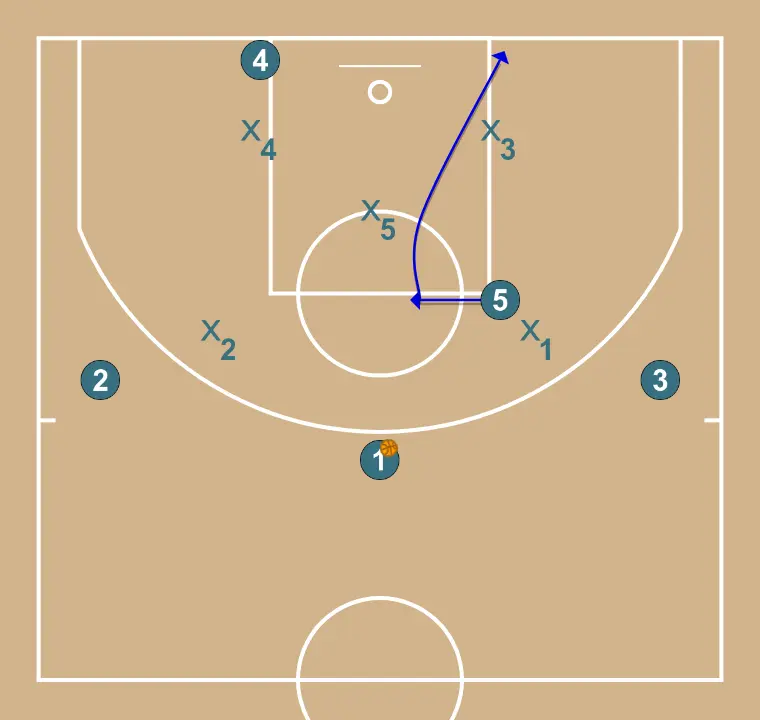
Center moves strategically to provide new passing lanes and open space. 5 adjusts position to facilitate ball movement and anticipate the defense.
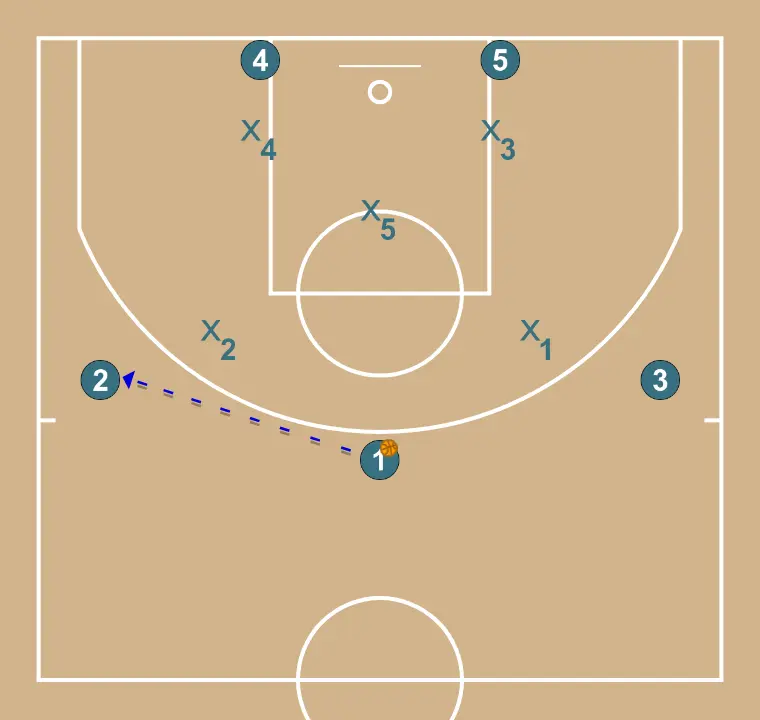
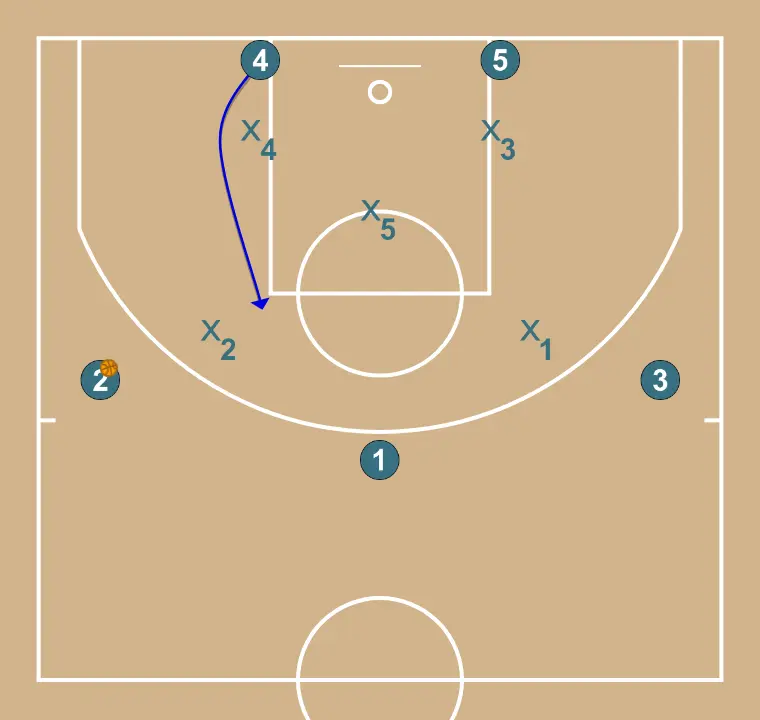
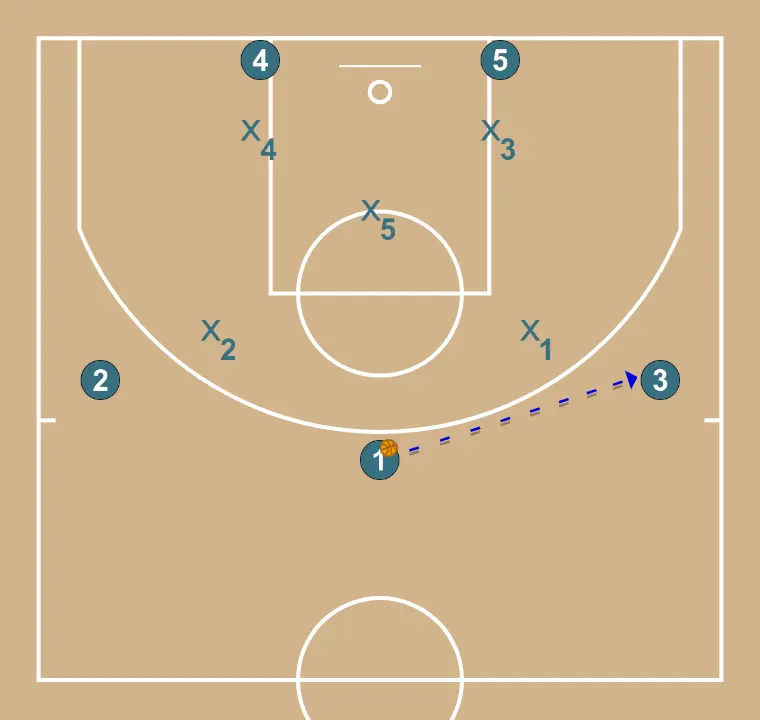
4 changes location seeking advantage over the defender and scoring opportunities.
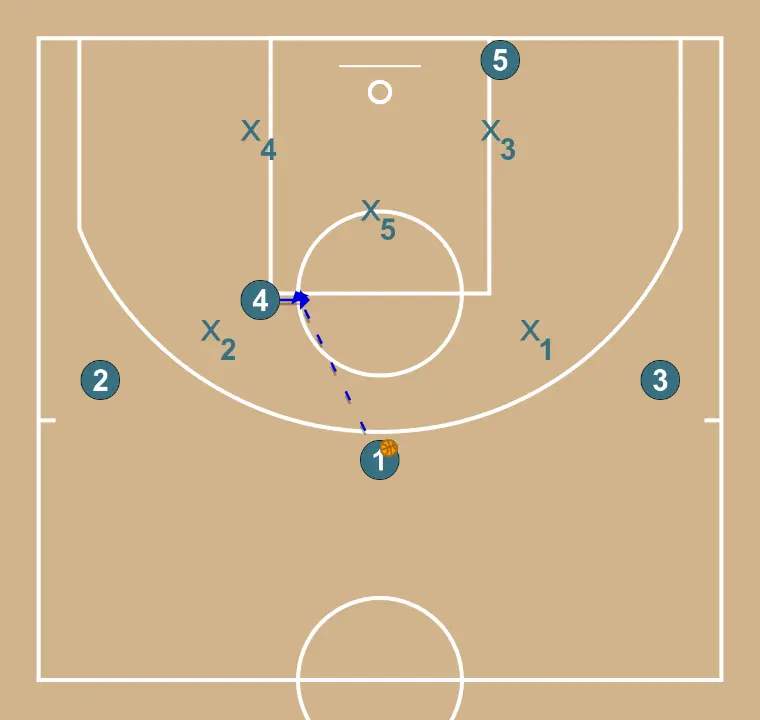
4 moves strategically to provide new passing lanes and open space.
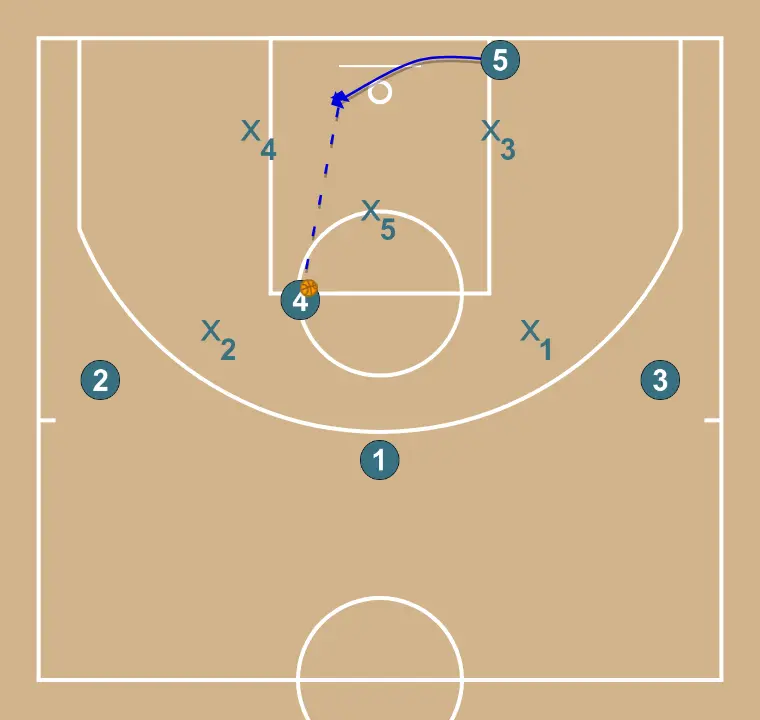
5 moves strategically to provide new passing lanes and open space.