Take your basketball to the next level
Save time, organize your team and prepare professional practices with advanced tools.
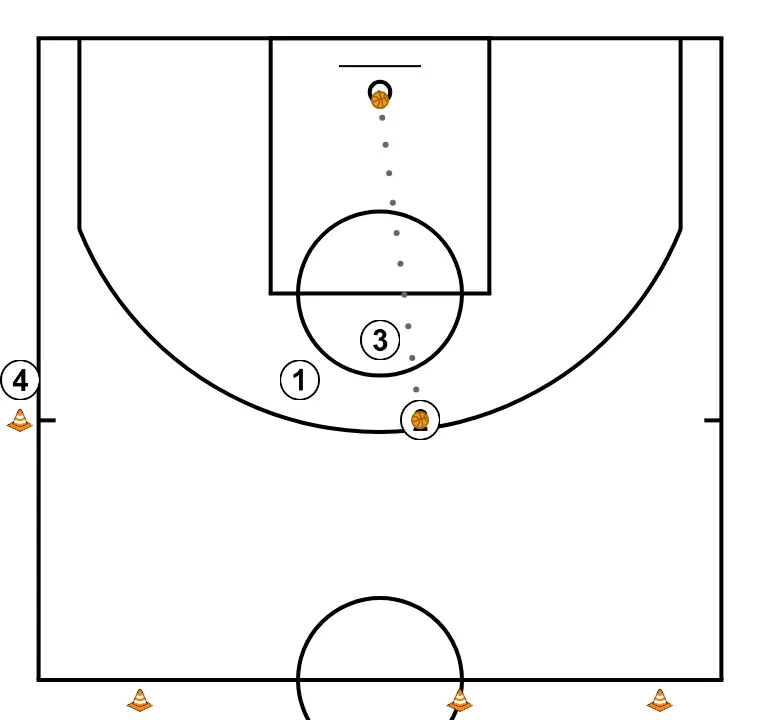
Shooting drill #2
Drill

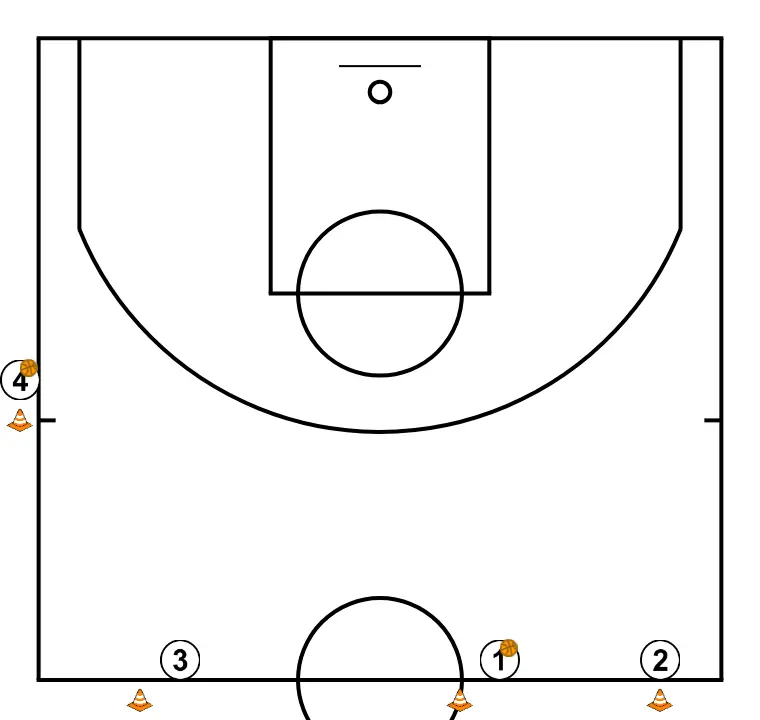
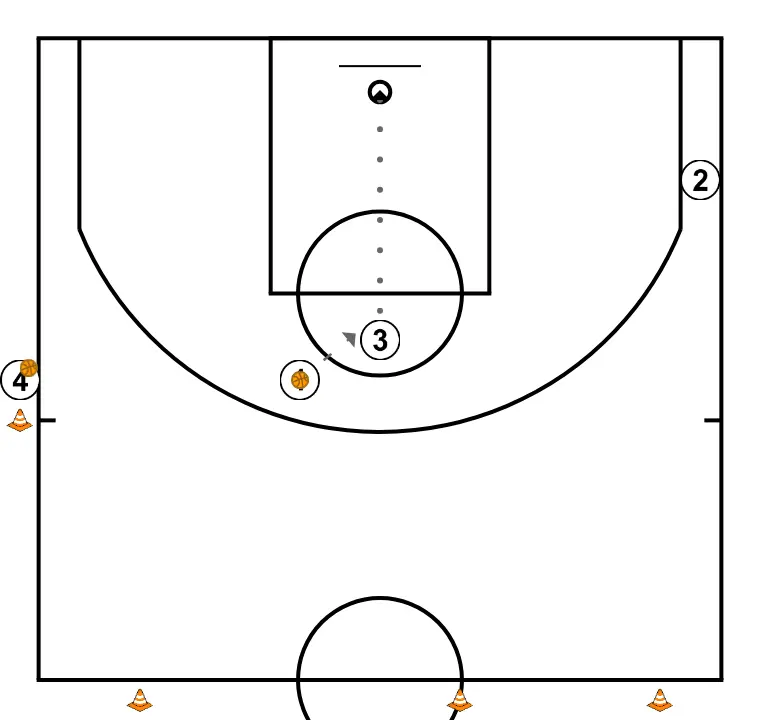
Players are positioned at key points on the court, seeking offensive and defensive balance.
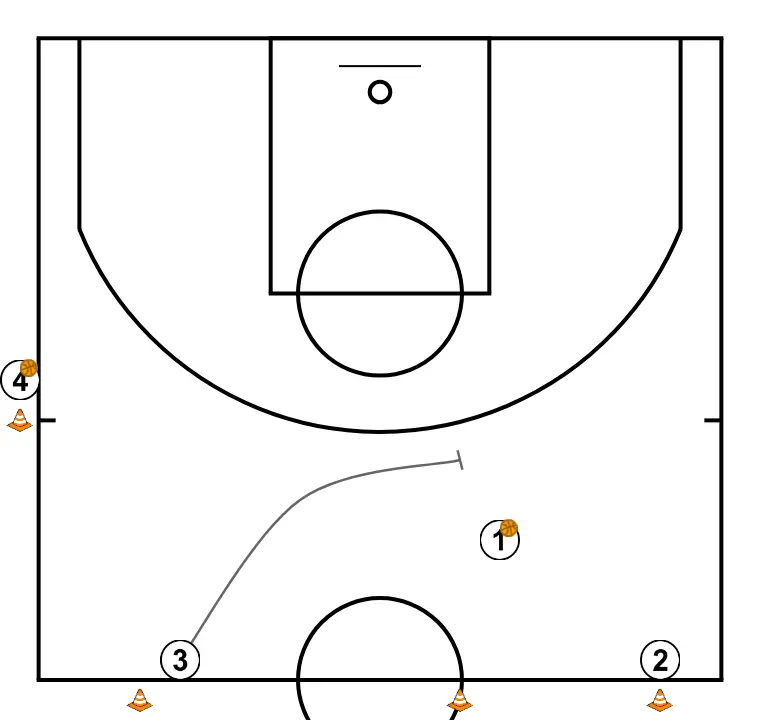
3 blocks the defender, opening space for cuts, drives, or shots.
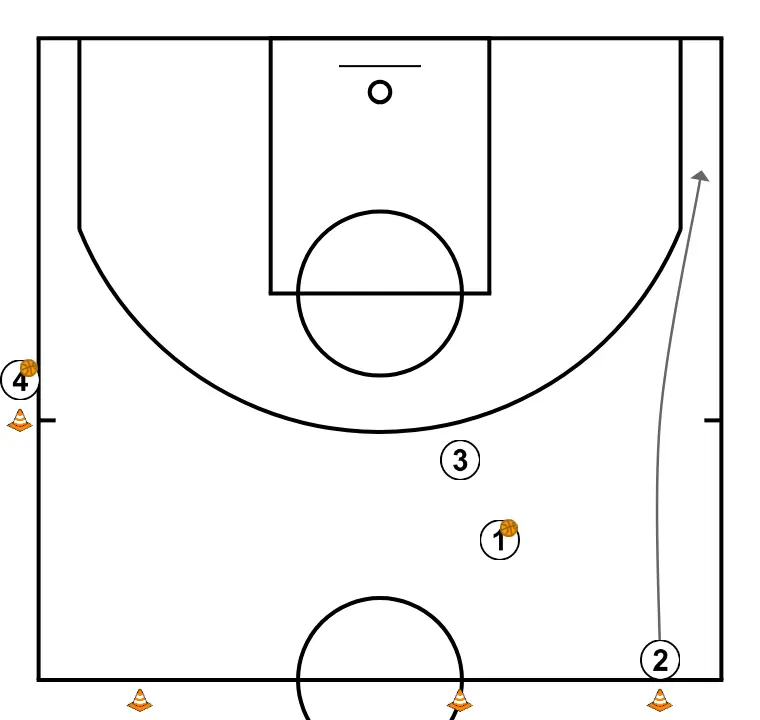
2 places themselves strategically to generate passing angles and anticipate defensive moves.
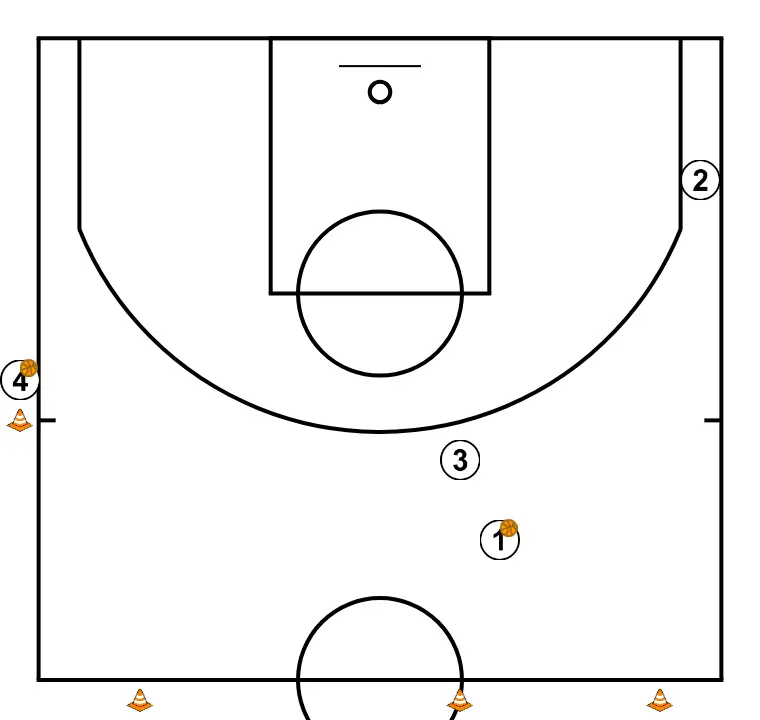
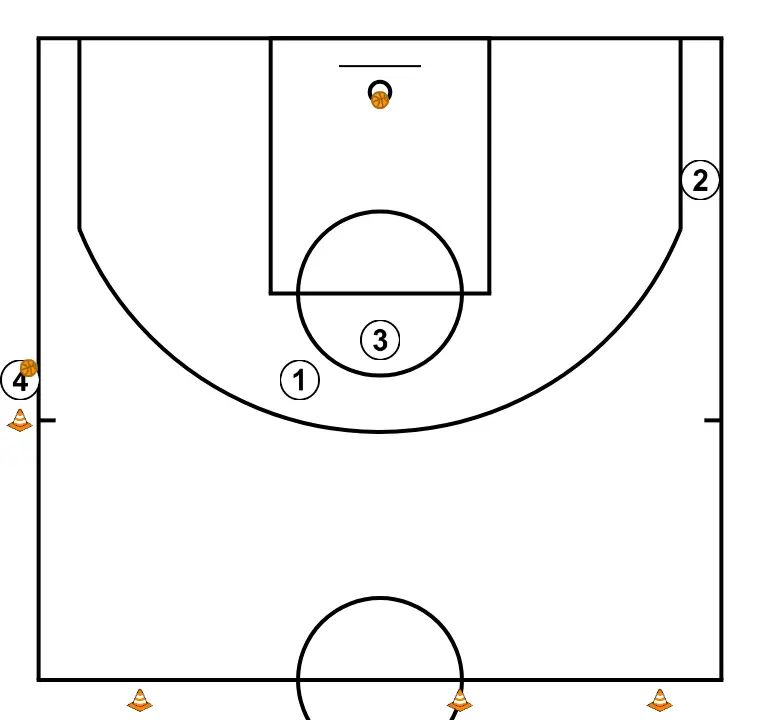
Players are positioned at key points on the court, seeking offensive and defensive balance.

3 adjusts position to facilitate ball movement and anticipate the defense.

Each player is located strategically to maximize effectiveness in the first phase of the attack.

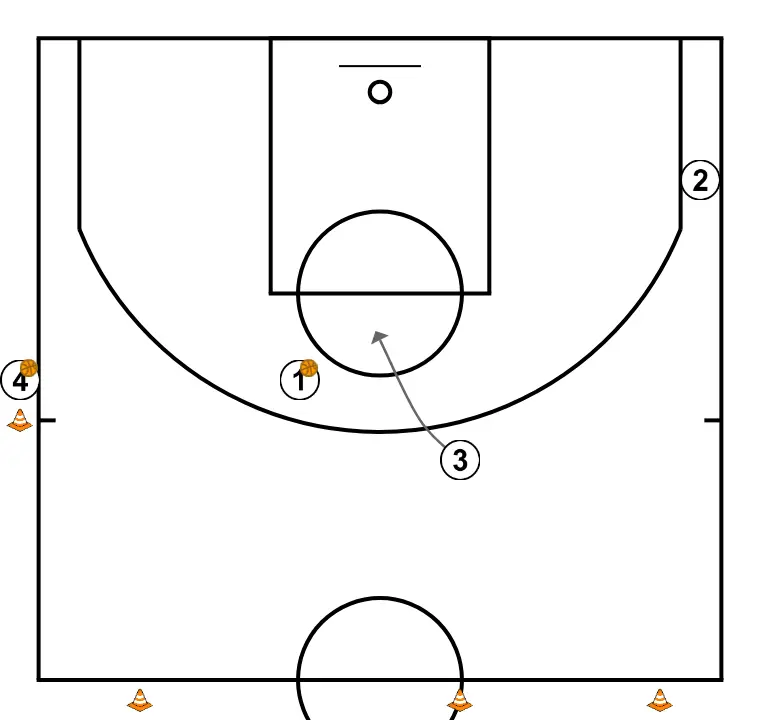
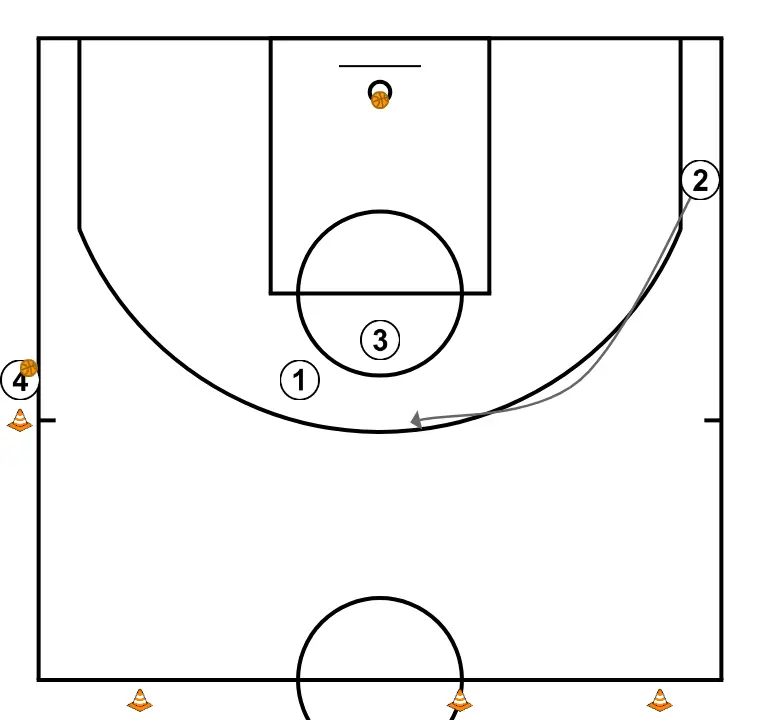
We define the starting positions of the players, placing each strategically to optimize passes and attacking options.
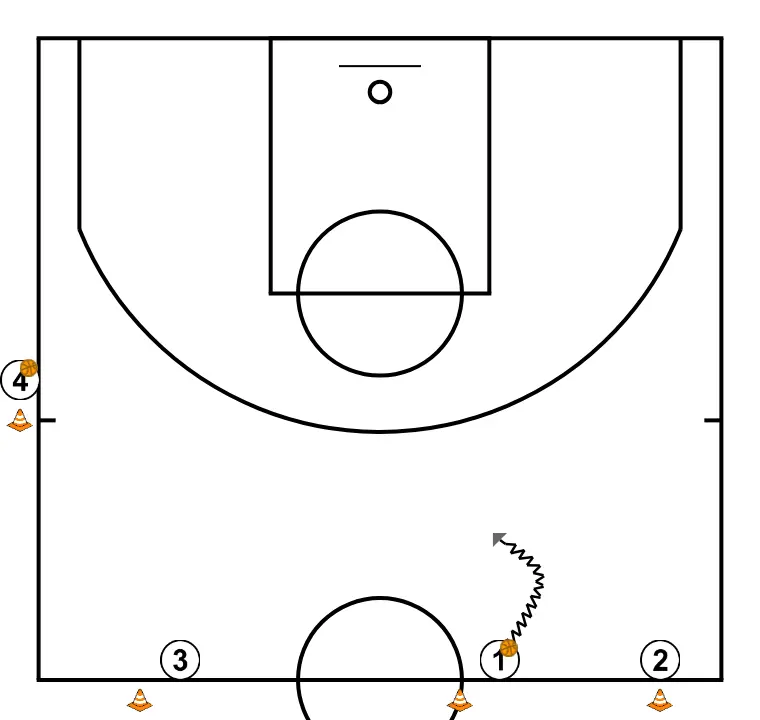
Players are positioned at key points on the court, seeking offensive and defensive balance.
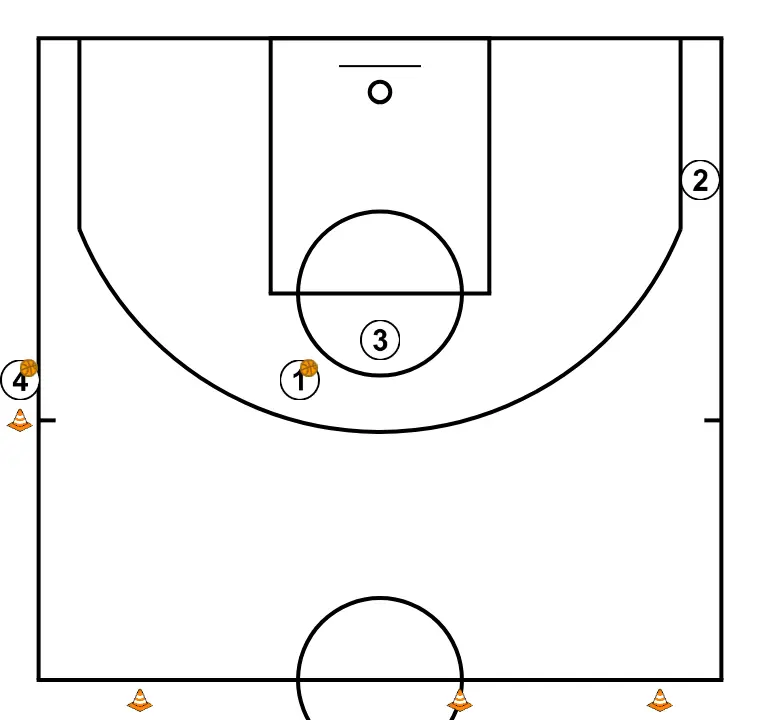
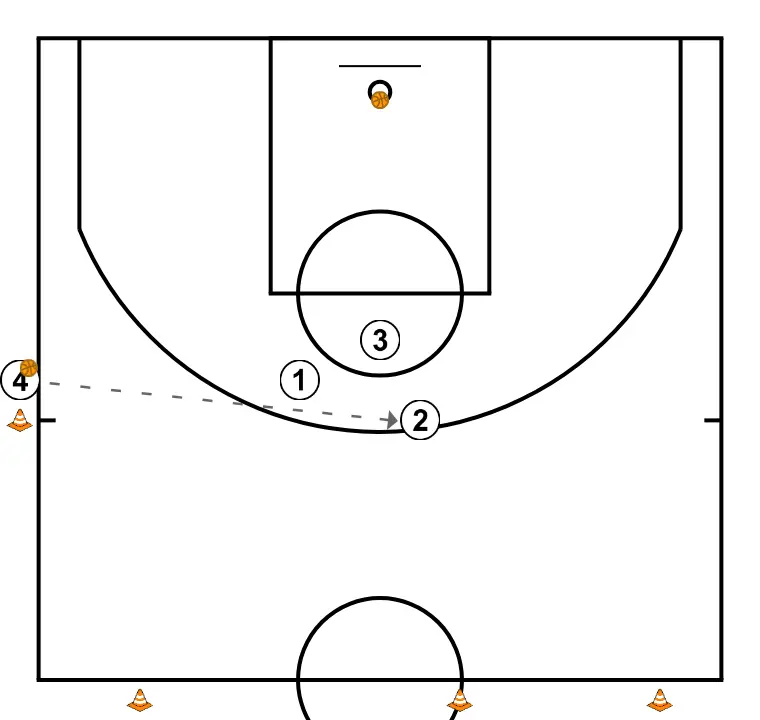
Players adopt their starting formation, prepared for coordinated movements and penetration options.
2 moves to support teammates and maintain constant game flow.

Related diagrams