Sideline Out "3"
🚀 Go Pro and level up your game
Access advanced tools, plays, and stats for professional coaches.
✅ First month free! Cancel anytime
Sideline Out "3"
Play
1190 views ·


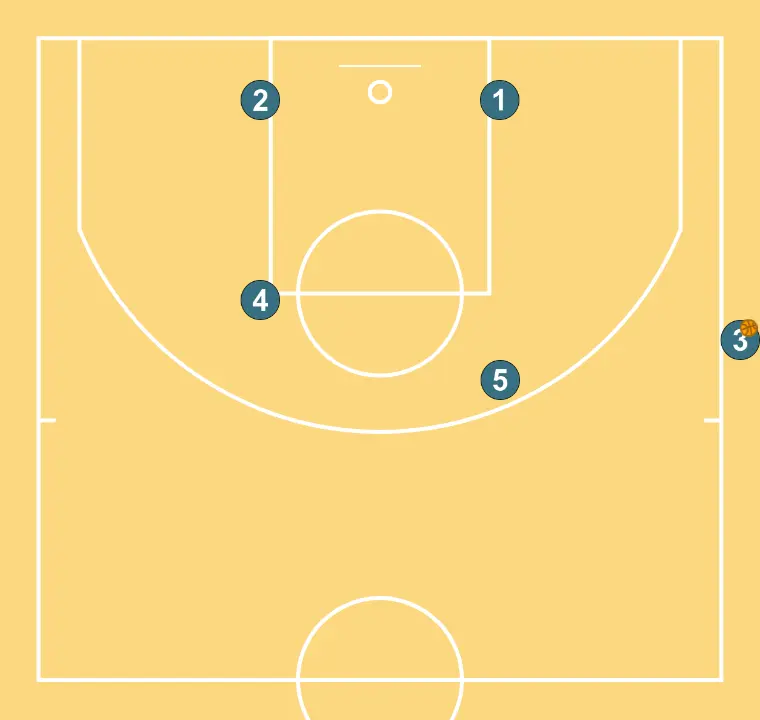
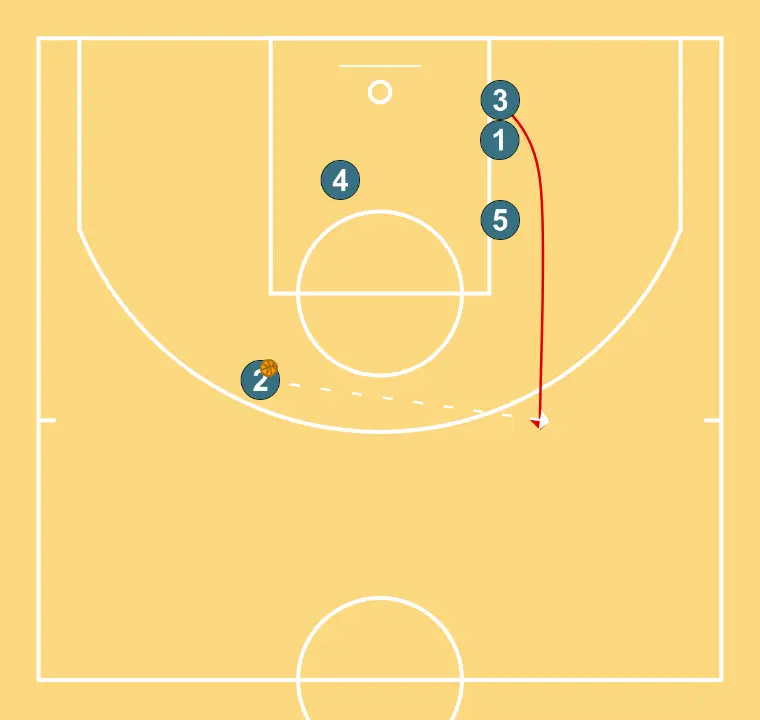
STEP 1
Players adopt their starting formation, prepared for coordinated movements and penetration options.
5 FAKES SCREEN FOR 1 AND MOVES BACK TO RECEIVE PASS FROM 3
WITH THE BALL IN THE AIR, 4 SCREENS 2
WITH THE BALL IN THE AIR, 4 SCREENS 2
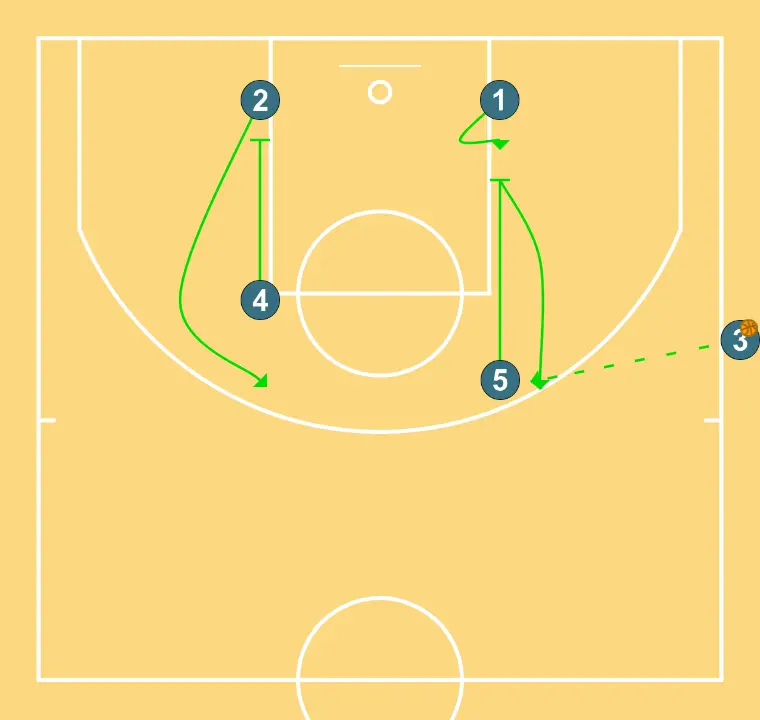
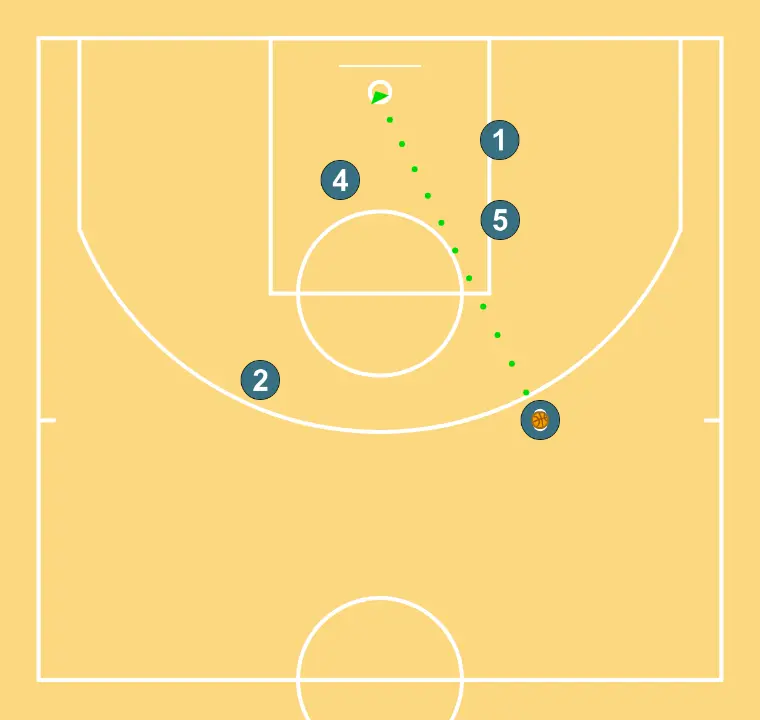
STEP 2
5 FAKES SCREEN FOR 1 AND MOVES BACK TO RECEIVE PASS FROM 3
WITH THE BALL IN THE AIR, 4 SCREENS 2
WITH THE BALL IN THE AIR, 4 SCREENS 2
5 PASSES TO 2
5 POSITIONS TO SET A STAGGERED SCREEN WITH 1 FOR 3
3 MOVES BEHIND 1
1 SETS UP STAGGERED SCREEN
4 ADJUSTS ANGLE TO SCREEN FOR 3
5 POSITIONS TO SET A STAGGERED SCREEN WITH 1 FOR 3
3 MOVES BEHIND 1
1 SETS UP STAGGERED SCREEN
4 ADJUSTS ANGLE TO SCREEN FOR 3
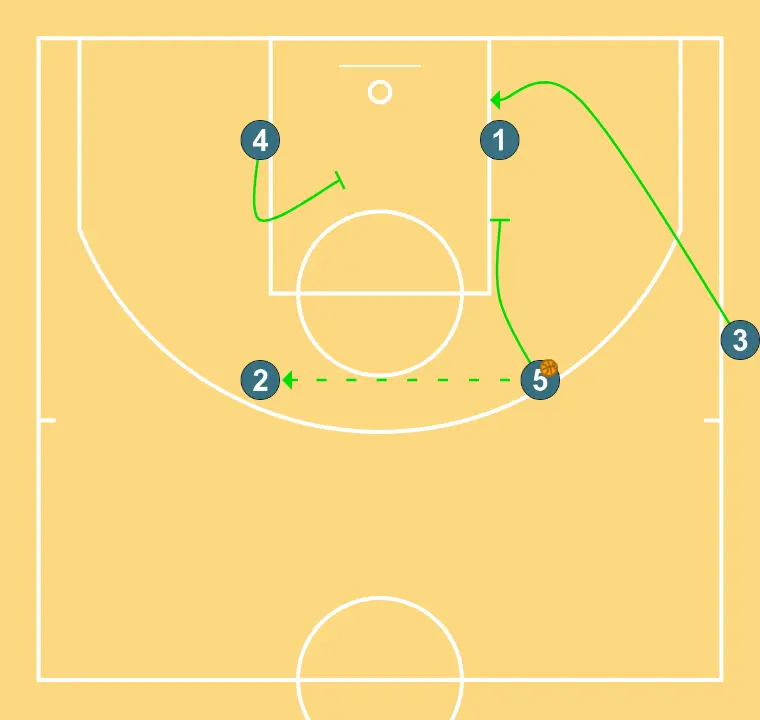
STEP 3
5 PASSES TO 2
5 POSITIONS TO SET A STAGGERED SCREEN WITH 1 FOR 3
3 MOVES BEHIND 1
1 SETS UP STAGGERED SCREEN
4 ADJUSTS ANGLE TO SCREEN FOR 3
5 POSITIONS TO SET A STAGGERED SCREEN WITH 1 FOR 3
3 MOVES BEHIND 1
1 SETS UP STAGGERED SCREEN
4 ADJUSTS ANGLE TO SCREEN FOR 3
3 DECIDES WHETHER TO USE THE STAGGERED SCREEN FROM 1 AND 5
OR USE A SINGLE SCREEN FROM 4
2 PASSES TO 3 FOR AN OPEN SHOT
OR USE A SINGLE SCREEN FROM 4
2 PASSES TO 3 FOR AN OPEN SHOT
STEP 4
3 DECIDES WHETHER TO USE THE STAGGERED SCREEN FROM 1 AND 5
OR USE A SINGLE SCREEN FROM 4
2 PASSES TO 3 FOR AN OPEN SHOT
OR USE A SINGLE SCREEN FROM 4
2 PASSES TO 3 FOR AN OPEN SHOT
STEP 5


 Swing")


