Elevator corner vs zone
Take your team to the next level
- Unlimited private diagrams
- Cycle-based planning
- Game plan
- Live stats recording
✅ First month free! Cancel anytime Export your content anytime and use it on any other platform. No restrictions.
Elevator corner vs zone
Play

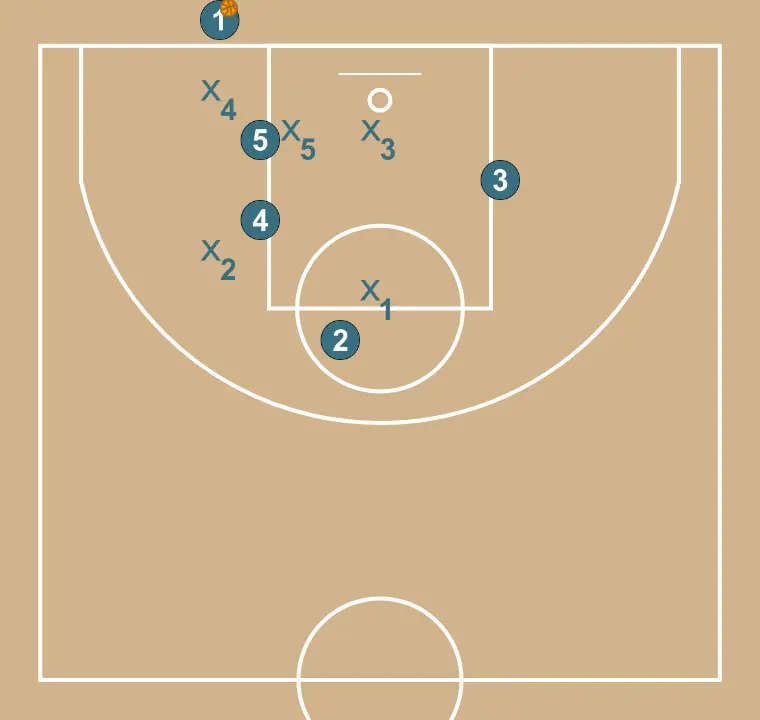
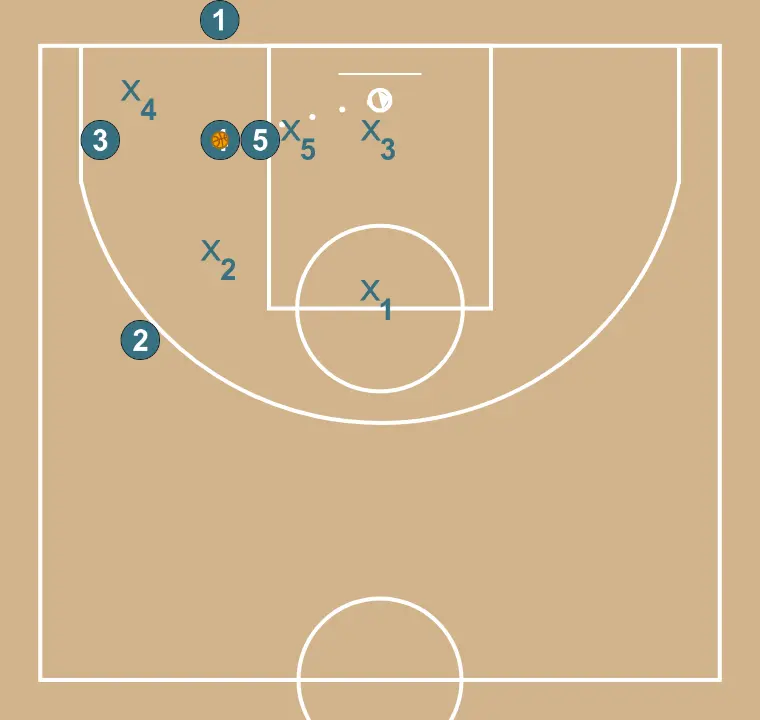
Inside players position themselves as shown in the diagram, on the inbounder’s side. The possible receiver 3 (our shooter) stays on the weak side, while the second outside receiver 2 stands at the free-throw line.
STEP 1
Inside players position themselves as shown in the diagram, on the inbounder’s side. The possible receiver 3 (our shooter) stays on the weak side, while the second outside receiver 2 stands at the free-throw line.
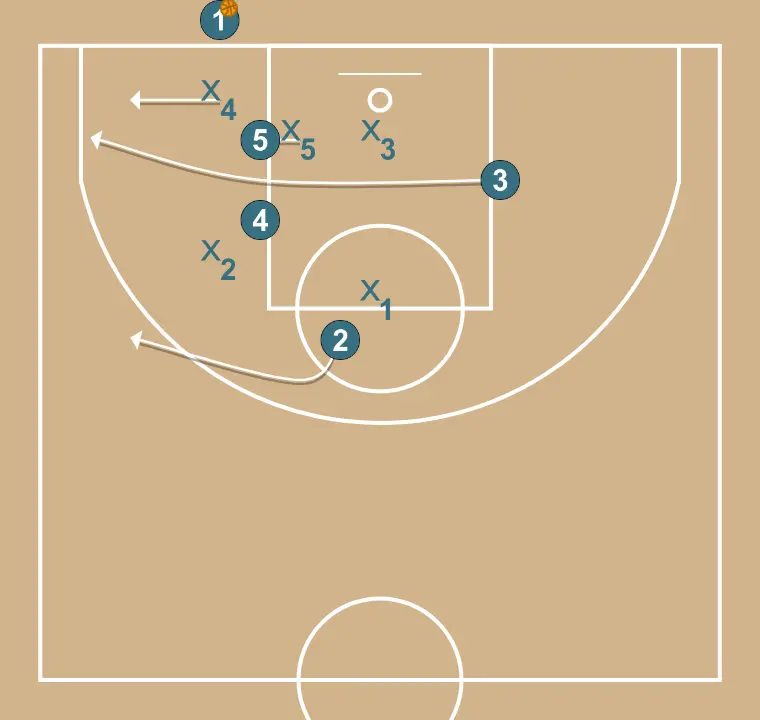
As soon as we have the ball to inbound, player 3 cuts between the two inside players to receive in the corner. Player 2 moves to the 45° spot so his defender must also cover a possible outside shot. Meanwhile:
- Player 5 screens his defender so player 4 can receive behind him for an easy shot (bank or short range).
STEP 2
As soon as we have the ball to inbound, player 3 cuts between the two inside players to receive in the corner. Player 2 moves to the 45° spot so his defender must also cover a possible outside shot. Meanwhile:
- Player 5 screens his defender so player 4 can receive behind him for an easy shot (bank or short range).
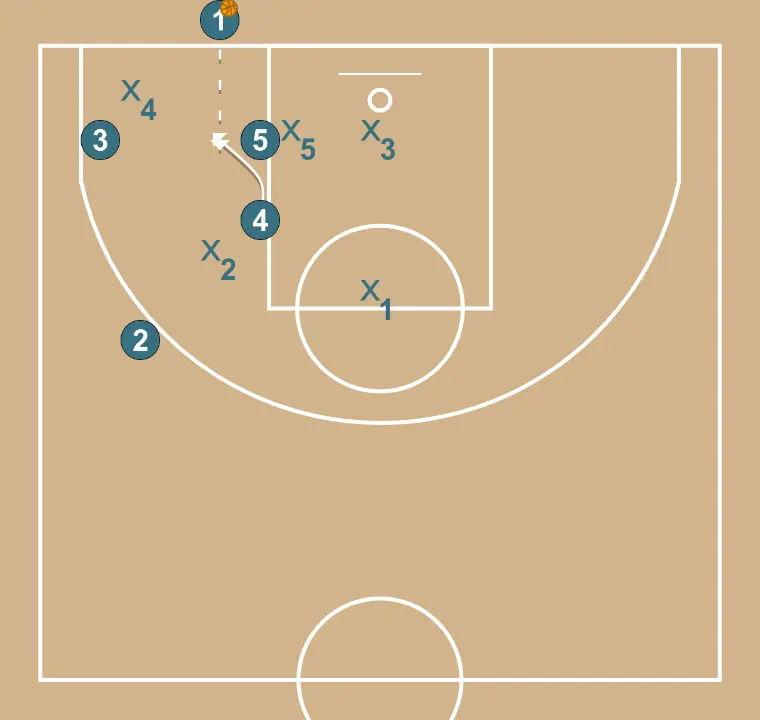
STEP 3
4 moves strategically to provide new passing lanes and open space.
STEP 4

Related diagrams
Set

fastbreak
1205 views ·
1205 views ·
Set

Daniel Herrero
0 views
0 views
Set

Cristian Blanco
1379 views ·
1379 views ·


