Passes and crosses
Pro banner

🚀 Go Pro and level up your game

Access advanced tools, plays, and stats for professional coaches.

✅ First 3 months free! Cancel anytime

Passes and crosses

Drill
846 views ·
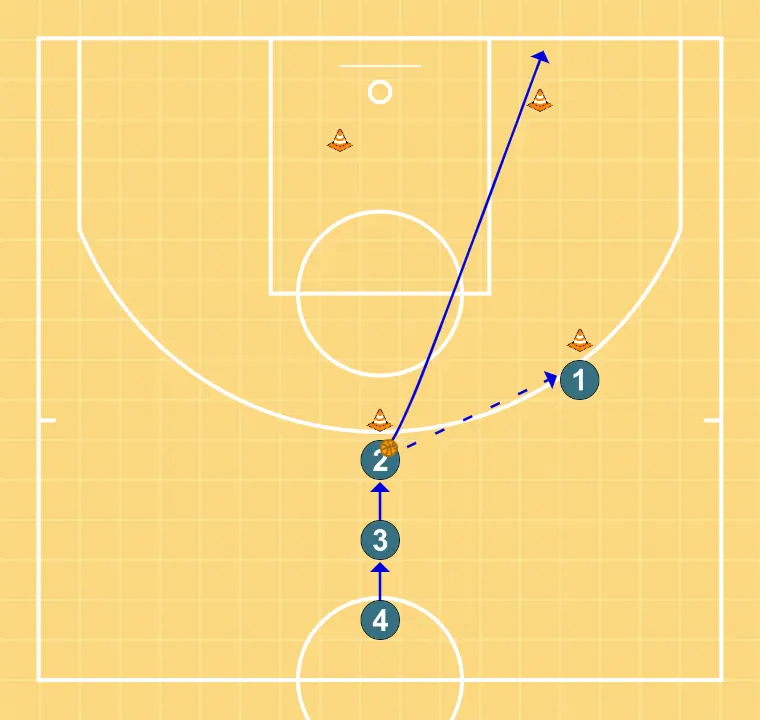
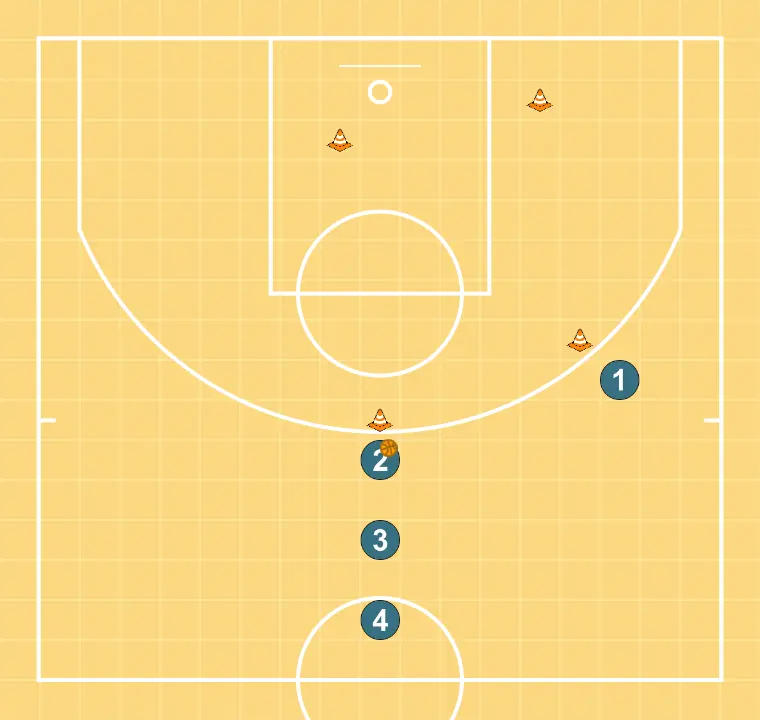
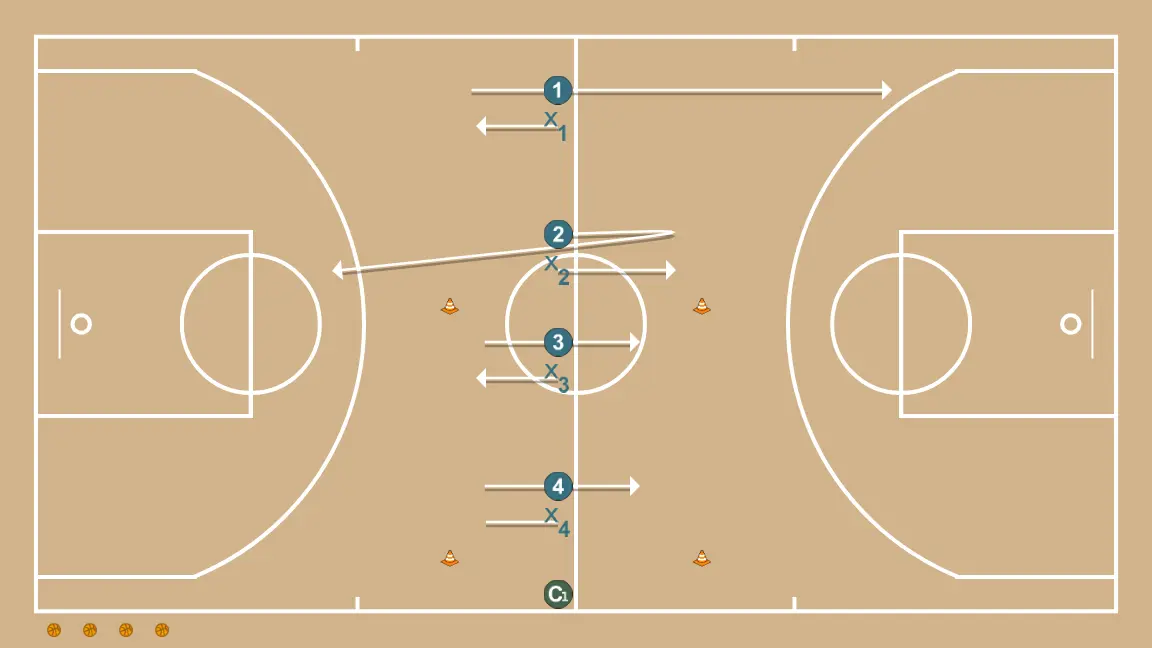
The drill focuses on passing and crossing. Requires 4 cones and a ball. Starts with three players at the center of the perimeter without the ball, except the first, and another player at 45º also on the perimeter.

#Basketball passing drills #Basketball team drills #Other basketball drills #Basketball conditioning drills

FAQ: Basketball Drills for Passing Accuracy and Speed
FAQ: Basketball Drills for Teamwork and Communication
FAQ: Other Basketball Drills and Complementary Exercises
FAQ: Basketball Drills for Conditioning and Physical Fitness
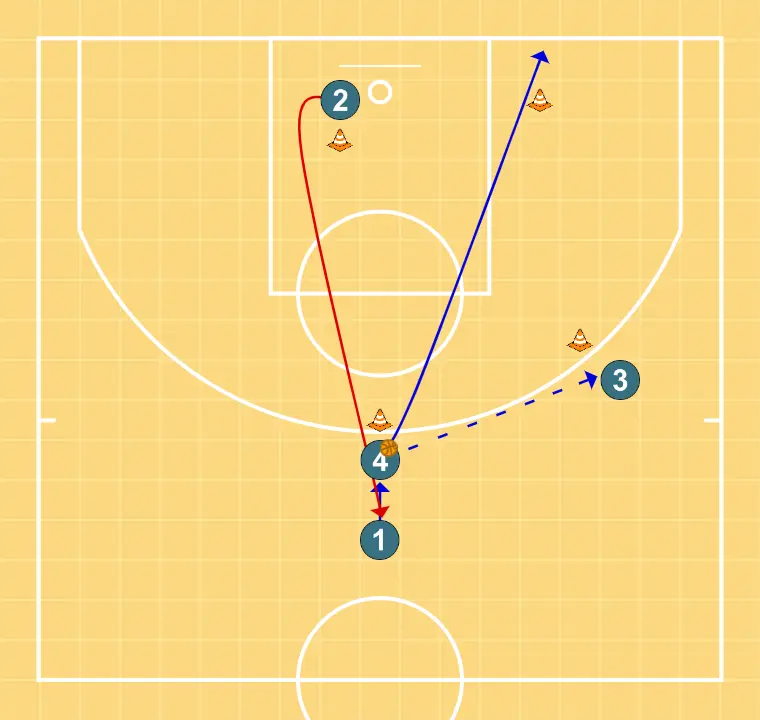
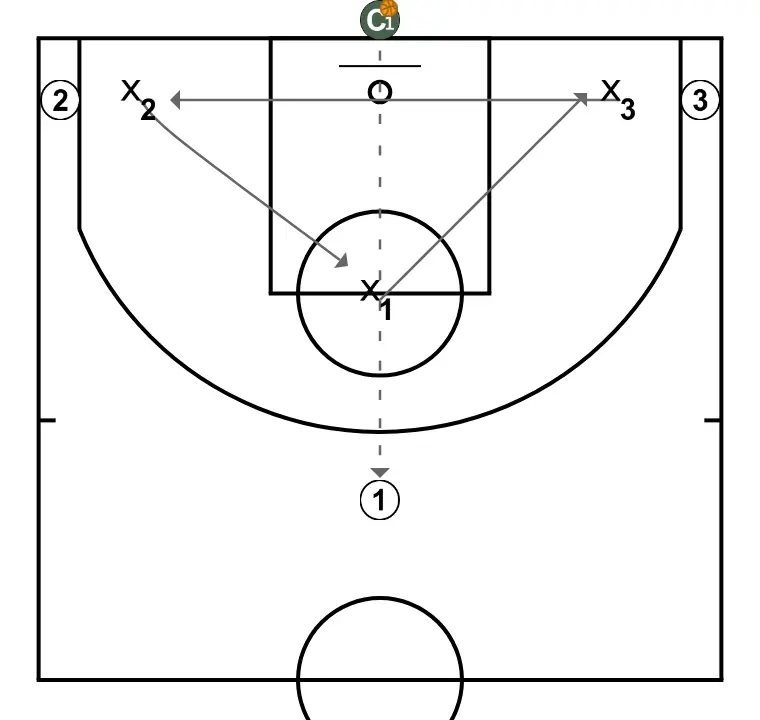
Passes and crosses - STEP 1: <div>The drill begins with 3 players at the center of the perimeter (or however many we want to place), without the ball except the first one, and another player without the ball at 45º on the perimeter
The drill begins with 3 players at the center of the perimeter (or however many we want to place), without the ball except the first one, and another player without the ball at 45º on the perimeter.
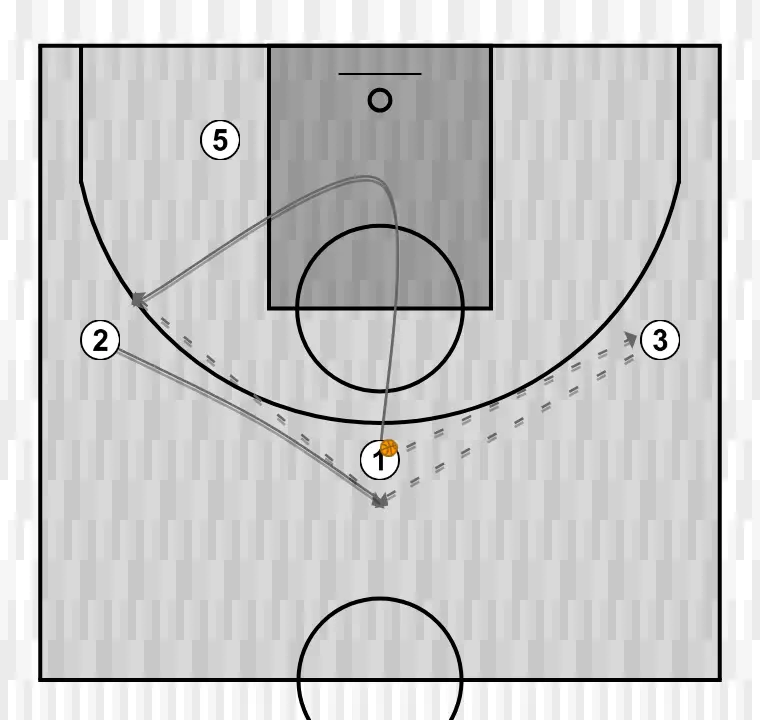
Step 1. Player 2 passes the ball to player 1 and immediately cuts toward the cone to go around it and take player 1’s spot.
Step 2. Then, player 2 passes to player 3 and cuts diagonally to go around the opposite cone and join the line in the center.
STEP 1

The drill begins with 3 players at the center of the perimeter (or however many we want to place), without the ball except the first one, and another player without the ball at 45º on the perimeter.
Step 1. Player 2 passes the ball to player 1 and immediately cuts toward the cone to go around it and take player 1’s spot.
Step 2. Then, player 2 passes to player 3 and cuts diagonally to go around the opposite cone and join the line in the center.

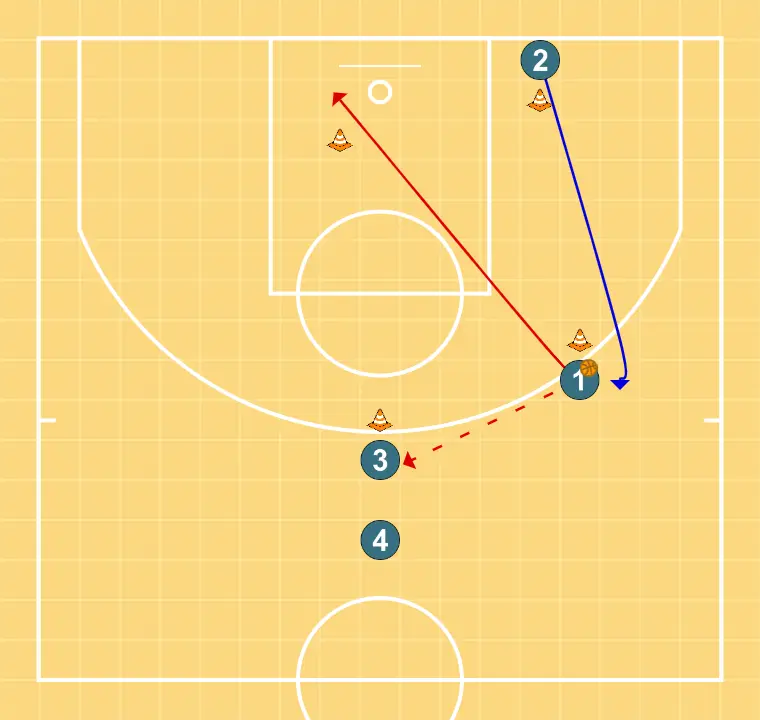
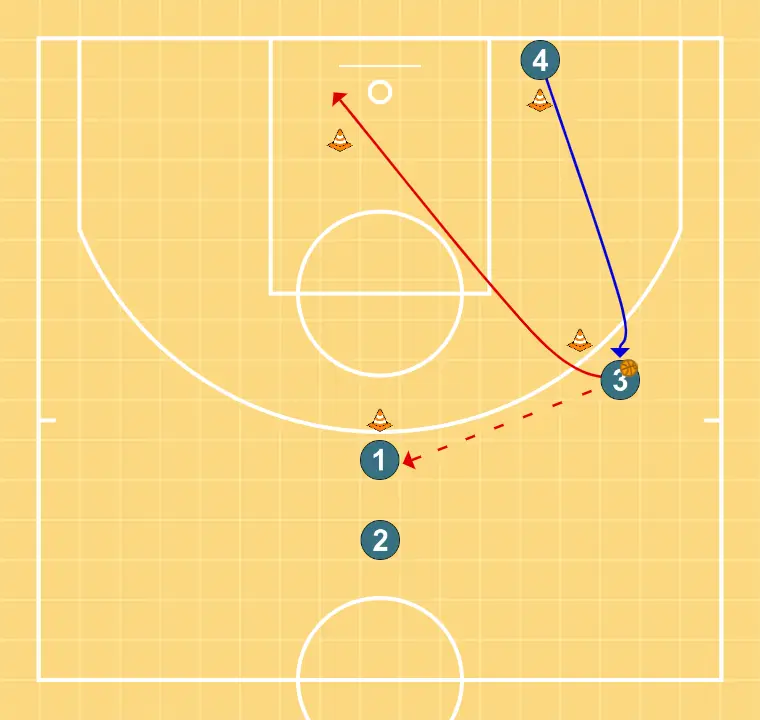
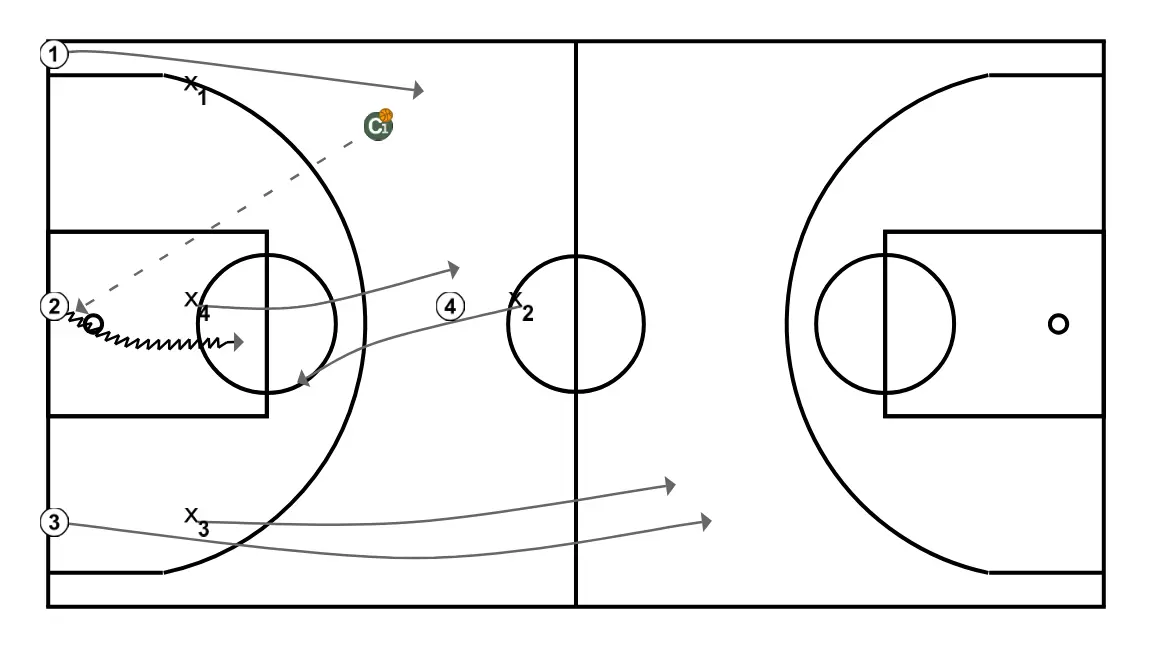
Passes and crosses - STEP 2: 2 changes location seeking advantage over the defender and scoring opportunities
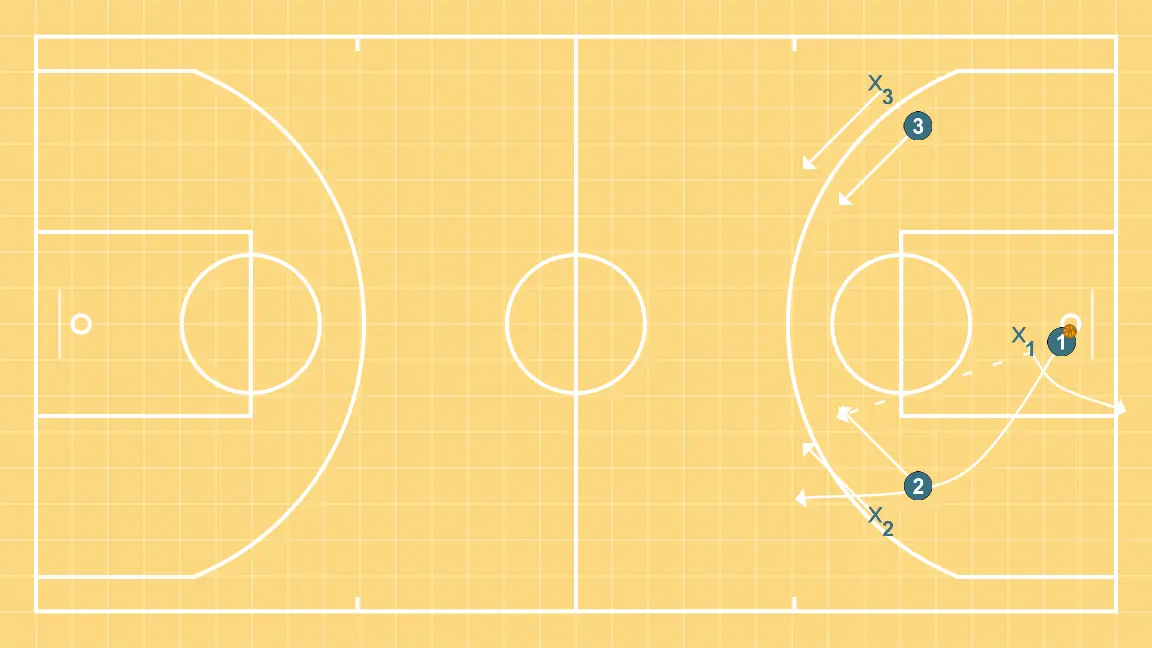
2 changes location seeking advantage over the defender and scoring opportunities. 1 adjusts position to facilitate ball movement and anticipate the defense.
STEP 2

2 changes location seeking advantage over the defender and scoring opportunities. 1 adjusts position to facilitate ball movement and anticipate the defense.

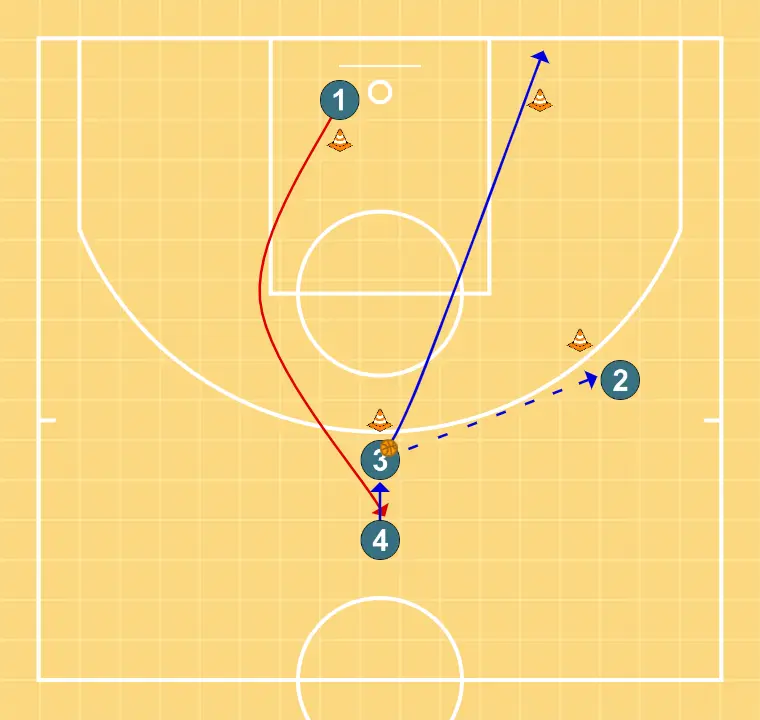
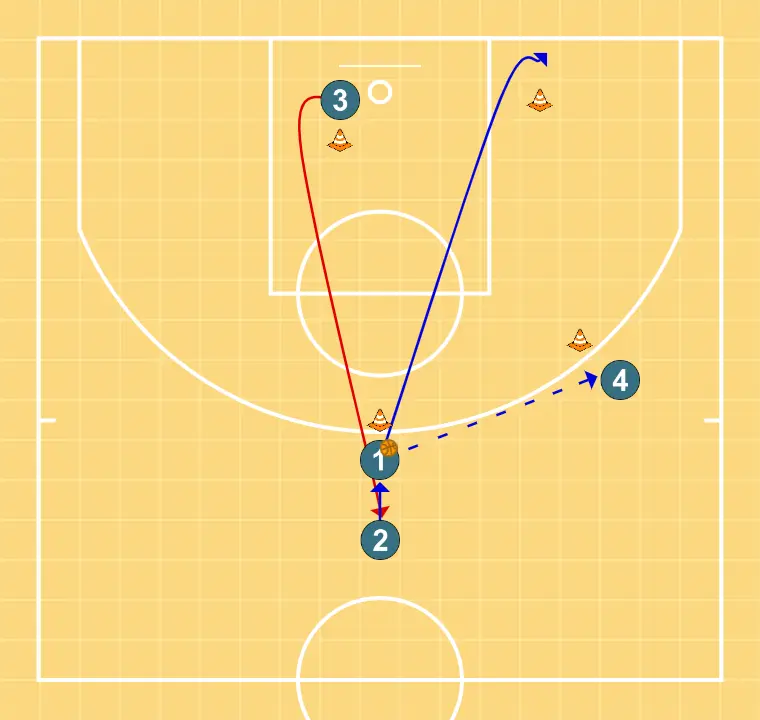
Passes and crosses - STEP 3: Point guard moves to support teammates and maintain constant game flow
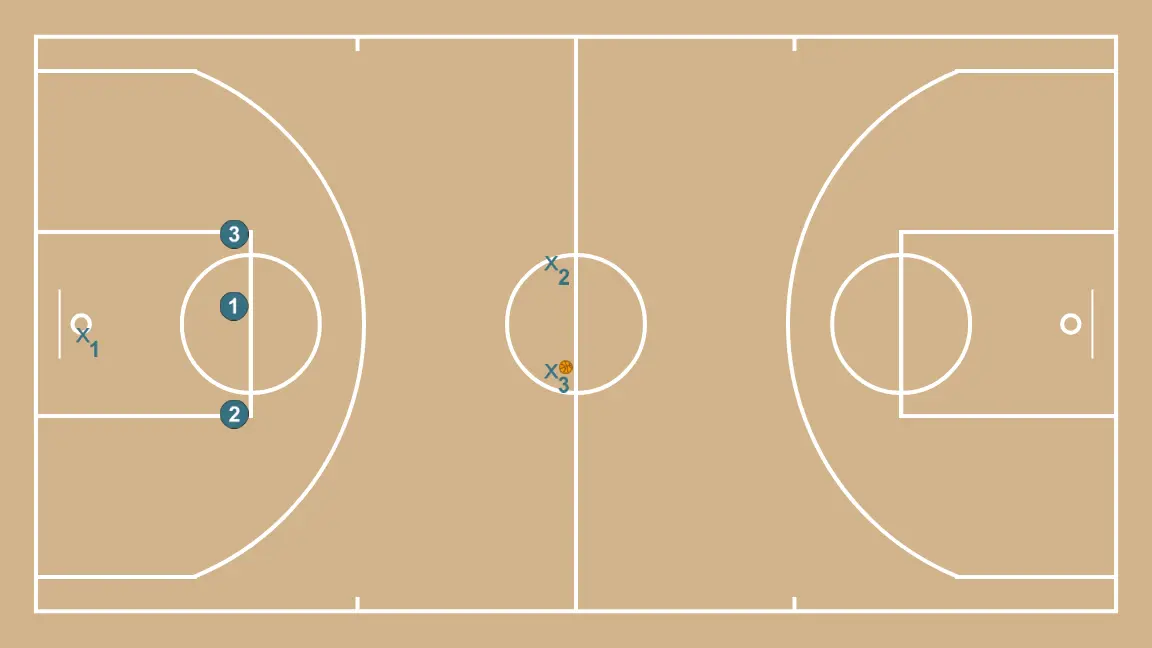
Point guard moves to support teammates and maintain constant game flow. 3 places themselves strategically to generate passing angles and anticipate defensive moves. 4 changes location seeking advantage over the defender and scoring opportunities.
STEP 3

Point guard moves to support teammates and maintain constant game flow. 3 places themselves strategically to generate passing angles and anticipate defensive moves. 4 changes location seeking advantage over the defender and scoring opportunities.

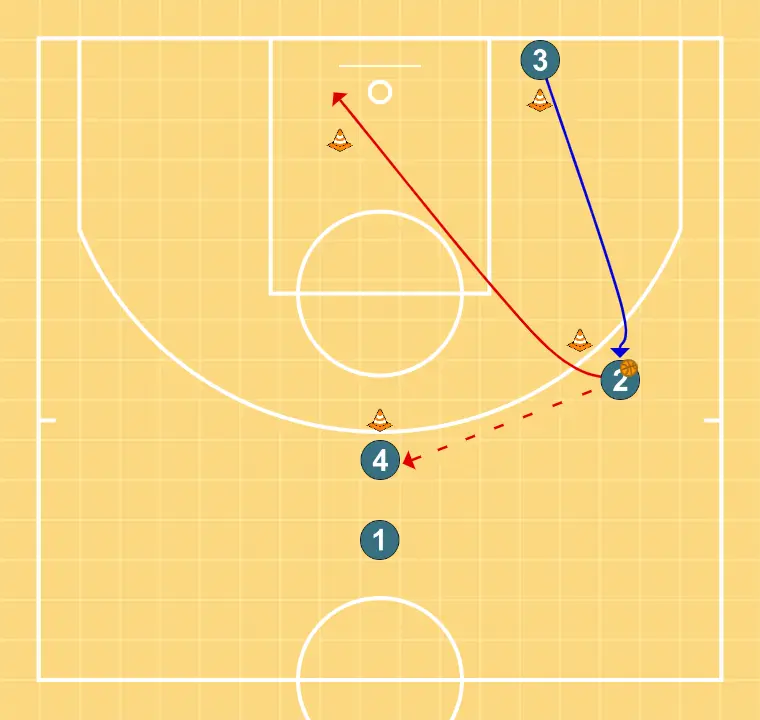
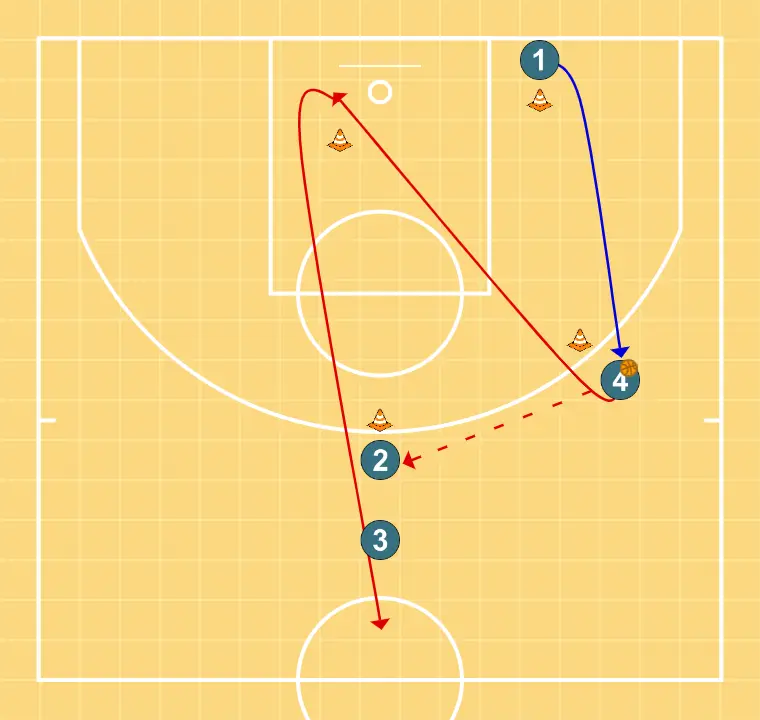
Passes and crosses - STEP 4: Small forward adjusts position to facilitate ball movement and anticipate the defense
Small forward adjusts position to facilitate ball movement and anticipate the defense. 2 shifts to an optimal spot on the court to maximize offensive efficiency.
STEP 4

Small forward adjusts position to facilitate ball movement and anticipate the defense. 2 shifts to an optimal spot on the court to maximize offensive efficiency.

Passes and crosses - STEP 5: 4 places themselves strategically to generate passing angles and anticipate defensive moves
4 places themselves strategically to generate passing angles and anticipate defensive moves. 1 alters position to create defensive mismatches and penetration options. Shooting guard adjusts position to facilitate ball movement and anticipate the defense.
STEP 5

4 places themselves strategically to generate passing angles and anticipate defensive moves. 1 alters position to create defensive mismatches and penetration options. Shooting guard adjusts position to facilitate ball movement and anticipate the defense.

Passes and crosses - STEP 6: Power forward moves to support teammates and maintain constant game flow
Power forward moves to support teammates and maintain constant game flow. 3 shifts to an optimal spot on the court to maximize offensive efficiency.
STEP 6

Power forward moves to support teammates and maintain constant game flow. 3 shifts to an optimal spot on the court to maximize offensive efficiency.

Passes and crosses - STEP 7: 3 changes location seeking advantage over the defender and scoring opportunities
3 changes location seeking advantage over the defender and scoring opportunities. Shooting guard moves to support teammates and maintain constant game flow. 1 changes location seeking advantage over the defender and scoring opportunities.
STEP 7

3 changes location seeking advantage over the defender and scoring opportunities. Shooting guard moves to support teammates and maintain constant game flow. 1 changes location seeking advantage over the defender and scoring opportunities.

Passes and crosses - STEP 8: 1 alters position to create defensive mismatches and penetration options
1 alters position to create defensive mismatches and penetration options. 4 moves to support teammates and maintain constant game flow. Power forward places themselves strategically to generate passing angles and anticipate defensive moves.
STEP 8

1 alters position to create defensive mismatches and penetration options. 4 moves to support teammates and maintain constant game flow. Power forward places themselves strategically to generate passing angles and anticipate defensive moves.

Passes and crosses - STEP 9: The initial setup is organized to create synergy between movements, screens, and passes for the opening play
The initial setup is organized to create synergy between movements, screens, and passes for the opening play.
STEP 9

The initial setup is organized to create synergy between movements, screens, and passes for the opening play.